Managing WordPress via the Hosting Control Panel
To manage a WordPress installation on your hosting without logging into the CMS admin dashboard, follow the instructions below.
Installing WordPress
1. Go to your hosting control panel and open the Sites (Сайты) section. Then click the site’s domain name to open its settings:

2. Click Install CMS (Установить CMS) in the CMS block:

3. Select WordPress, then enter the required details for automatic installation and click Continue (Продолжить):

4. On the final page, you will see the main credentials needed for further work with the site:

5. After installation, the site settings (step 1 of this guide) will display information about the CMS along with management controls:

Managing the WordPress Installation
Basic information about the installation is available in the CMS block in the site settings:
- The current WordPress version is shown in the Version (Версия) field:

- To automatically update WordPress to the latest available versions, enable Update automatically (Обновлять автоматически):

- You can reinstall or remove the CMS using the corresponding buttons:

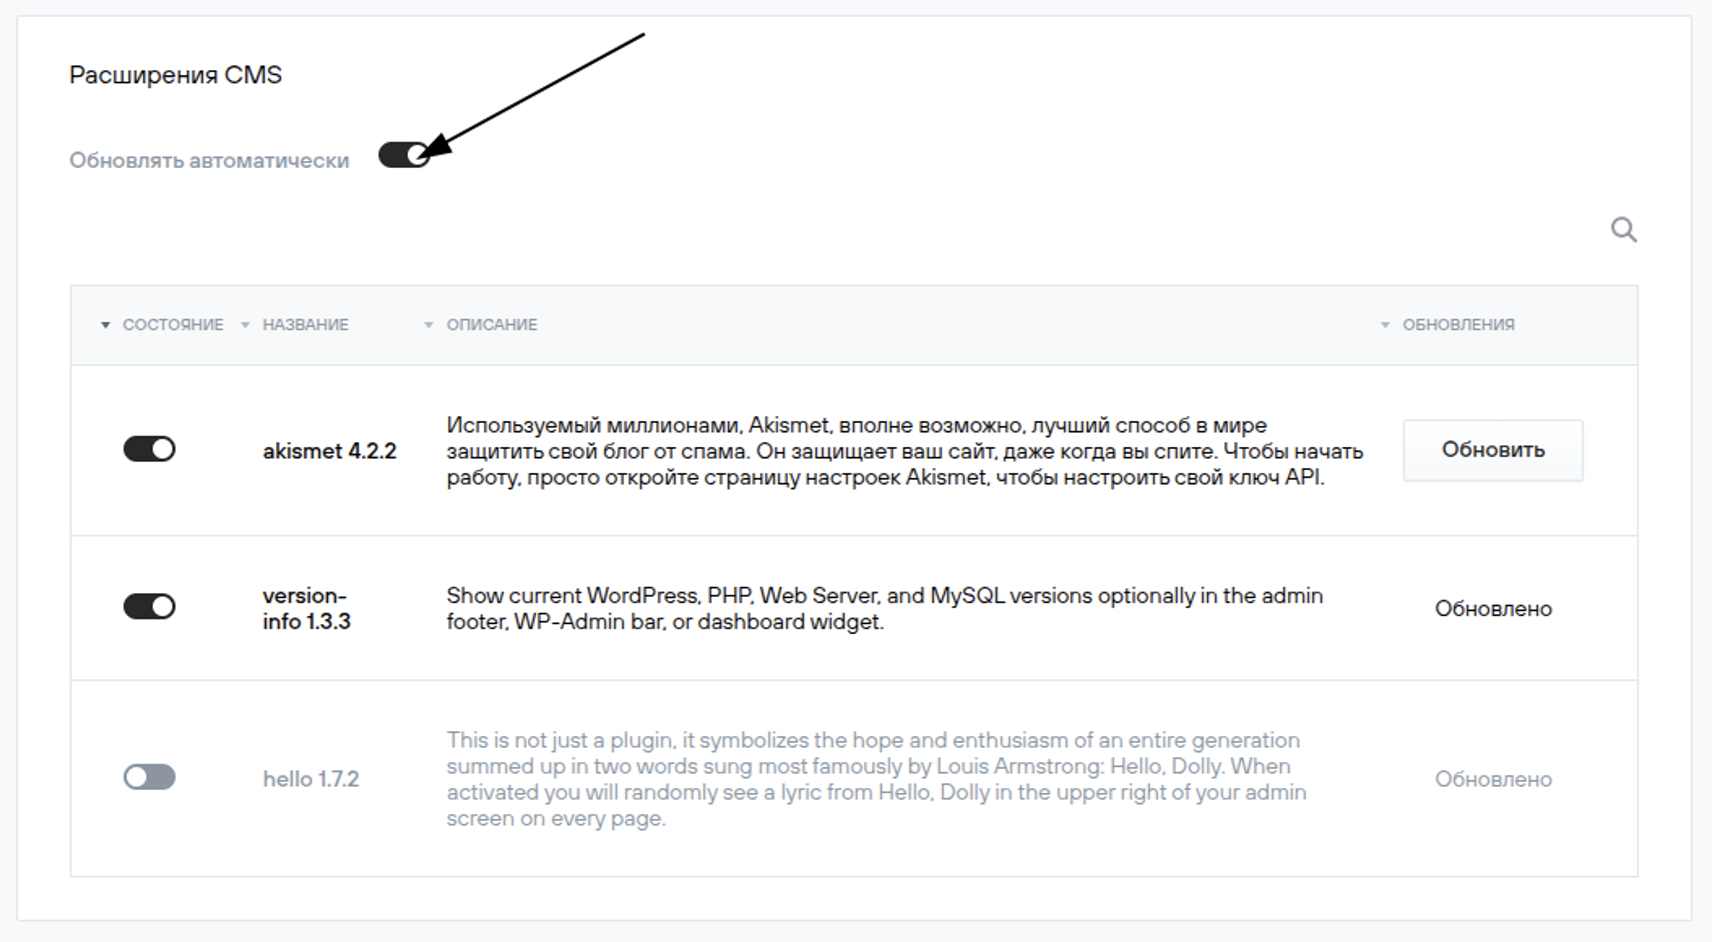
Managing Extensions (Plugins)
Below the CMS block is the CMS Extensions block, which contains information about the installed WordPress extensions (plugins).
You can enable/disable or update a selected extension (plugin) to the latest available version:

To automatically update extensions (plugins) to the latest available versions, enable Update automatically (Обновлять автоматически):