Manually restoring a website from a backup
- Method 1: control panel file manager
- Method 2: file restoration via SSH
- Method 3: website restoration using FTP
- Restoring a database
By default, the root directory of the website is /home/login/your_domain/docs. Therefore, to restore the website files, you need to replace the files in the root directory with files from the backup. This can be done using the file manager in the hosting control panel, or by connecting to the hosting via FTP or SSH.
Before proceeding with the restoration, make sure that there is enough free space on the hosting and that the website to be restored has been added to the hosting. There should be enough disk space for both the old website files and the backup files.
- You can redistribute disk space in Resources (Ресурсы) of the hosting control panel.
- You can add a website in the Websites (Сайты) section.
Method 1: control panel file manager
Go to File Manager and save the current files of the website (recommended):
- Open the folder with website name Your_Domain;
- Tick the docs folder, then click the Rename icon on the toolbar.

- Enter new folder name (for example, docs_old). Then click on Save. If there is not enough space on the hosting, save the old files on your computer and delete docs_old.

Thus, the current version of the website files will be saved. Later, if necessary, it can be deleted.
- Move the files from the backup to the root directory of the website:
- Go to File Manager;
- Open the backup folder in the /home/login/backup/ folder, then go to the folder containing your website files Your_Domain;
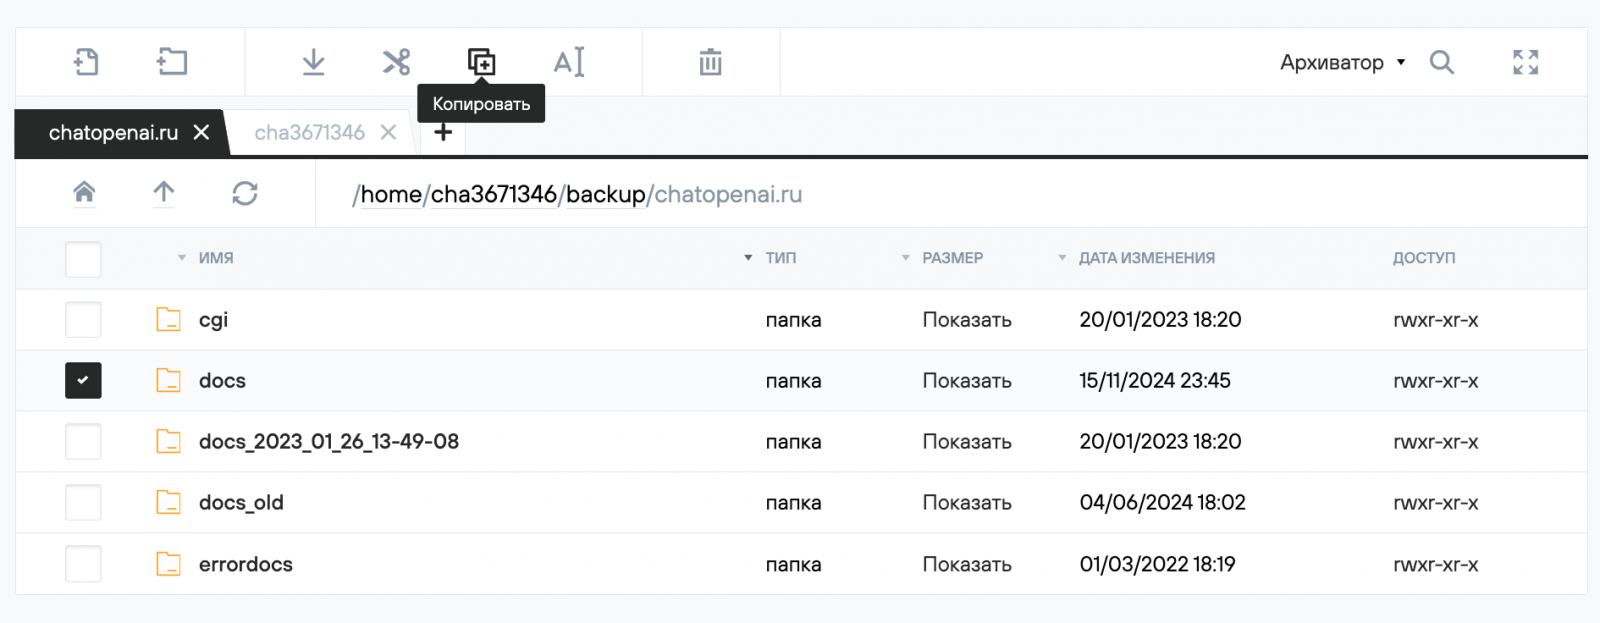
- Select the folder containing the docs files by putting a tick on the left, then click the Copy button on the toolbar above the list of files and directories.
- Click on the arrow to return to the home directory /home/login/, where your website folder is located.
- Open the website directory and paste the previously copied docs folder by clicking the Paste button on the toolbar. The website files will be restored.

Method 2: restoration of files using SSH
Connect to the hosting service via SSH using Putty. The connection procedure is described on the SSH access page.
- Start the file manager with the mc command.
- In the left pane of the file manager, go to the folder containing the backup, and in the right pane, go to the folder containing the website. You can switch between tabs by clicking the Tab key on the keyboard.
.png)
- Save the current files of the website by renaming the docs directory to docs_old. To do this, in the right pane of the file manager, hover the cursor over the docs folder and press Shift + F6 on the keyboard. In the To field, enter the new name of the docs_old folder and click OK.
.png)
- To move files from the backup, hover the cursor over the docs directory in the left pane and press F6 to move the files, or F5 to copy them. Click OK in the window that opens. The files have been moved.
.png)
Method 3: restoration of files using FTP
- Connect to the hosting via FTP. The connection procedure is described on the FTP page — uploading files to the server. In our example, we use the FileZilla FTP client.
- In the Deleted website window, open the folder containing the website and the folder containing the backup copy.
(1).png)
- Rename the current docs website root directory by right-clicking, selecting Rename from the menu, and specifying the new name of docs_old.
(1).png)
- To transfer the docs directory from the backup, grab it with the mouse and drag it to the website directory. The files have been moved.
(1).png)
Restoring a database
The backup contains database dumps from your hosting (files with the .mysql extension). To restore the website database, you need to create a new database on the hosting, then import the dump from the backup copy into it using PHPMyAdmin or the command line. After that, you will need to change the database name to the new one in the website configuration files and make sure that the website is functioning properly. For this procedure, you will need the parameters for connecting to the database server (see article Connecting to a MySQL Server).
To restore a database using PHPMyAdmin, take the following steps.
- Go to File Manager and open the backup directory in the /home/login/tmp/date folder, where login is your hosting ID and date is the date for which the backup was uploaded.
- Download the login_db.sql database dump to your computer by selecting it from the list and clicking the Download button.
.png)
- Create a new database (for example, login_test) in the Databases section. To do this, select the Create database button.

- In the Attribution dropdown menu, select the website that will use this database, and then click Save.

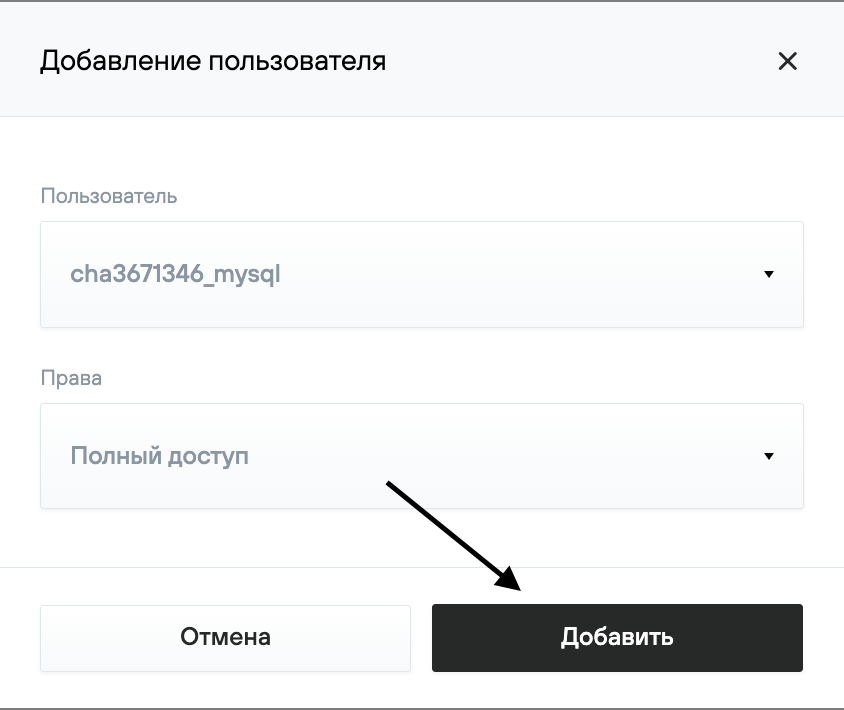
- Next, click Add User and select the necessary MySQL user from the dropdown list. In the Rights field, it is recommended to set the value to Full Access. Then click Create.
- Go to Databases → PHPMyAdmin.

- Log in using your database username and password.
.png)
- In the left column, select the new database you created (login_test) (1). Open the Import tab (2).
- In the Imported File section, click the Select File button (3), and in the window that opens, select the downloaded database dump. Click the OK button at the bottom right and wait for the import to complete.

If the dump size is over 1 GB, it can only be imported via SSH. A detailed description of working with PHPMyAdmin and the procedure for importing a dump via SSH is available in the article MySQL Database Dump.
After the database has been imported, change the name of the old database to the new one in the website configuration files and check that everything is working properly. If the website displays a database connection error, we recommend checking if the database connection credentials in the website scripts are correct. You can find out the location of configuration files containing database access credentials from the website developer or by following the instructions in Configuration files for popular CMS.