Automatic Installation of WordPress
1. Website creation
2. Additional information
3. Managing WordPress via the Hosting Control Panel
1. Website creation
1. First, you need to point your domain to the hosting according to the instructions. If the domain name is not yet registered, you can use the service (temporary) name.
2. Log in to the hosting control panel using your contract number and password.
3. Go to the Sites (Сайты) section.
4. Click the Create Site (Создать сайт) button in the top right corner.

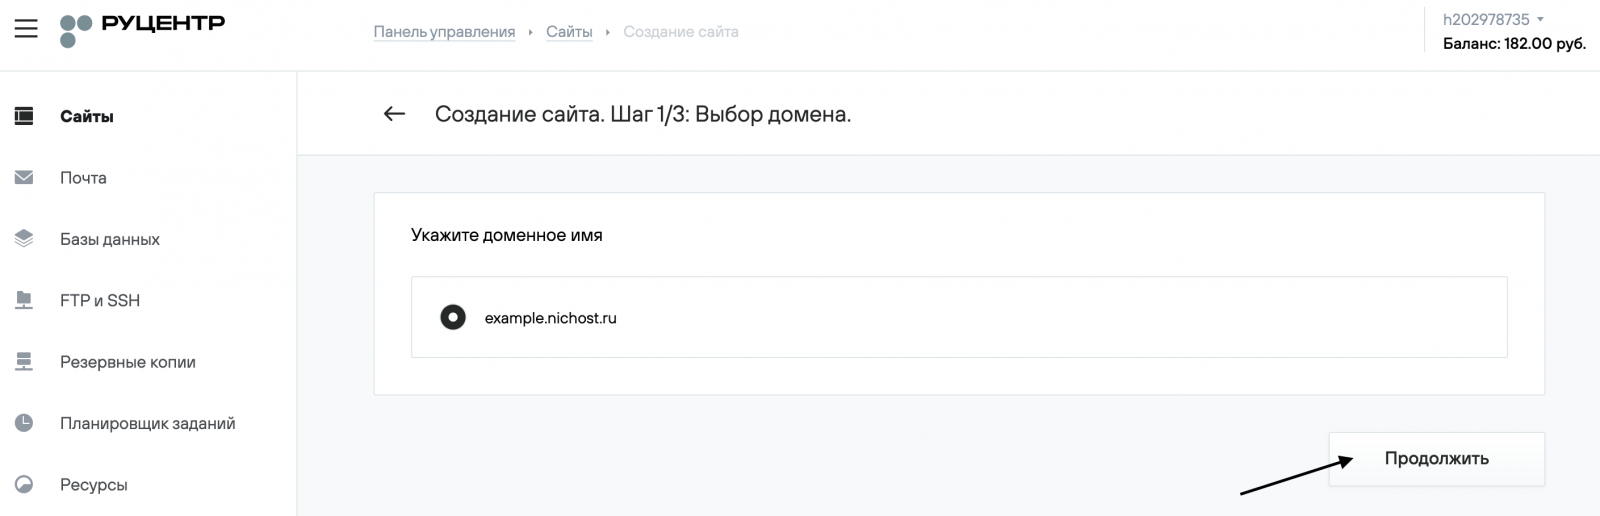
5. Choose a domain from the list of domains registered under your contract or enter the site name manually, then click Continue (Продолжить).
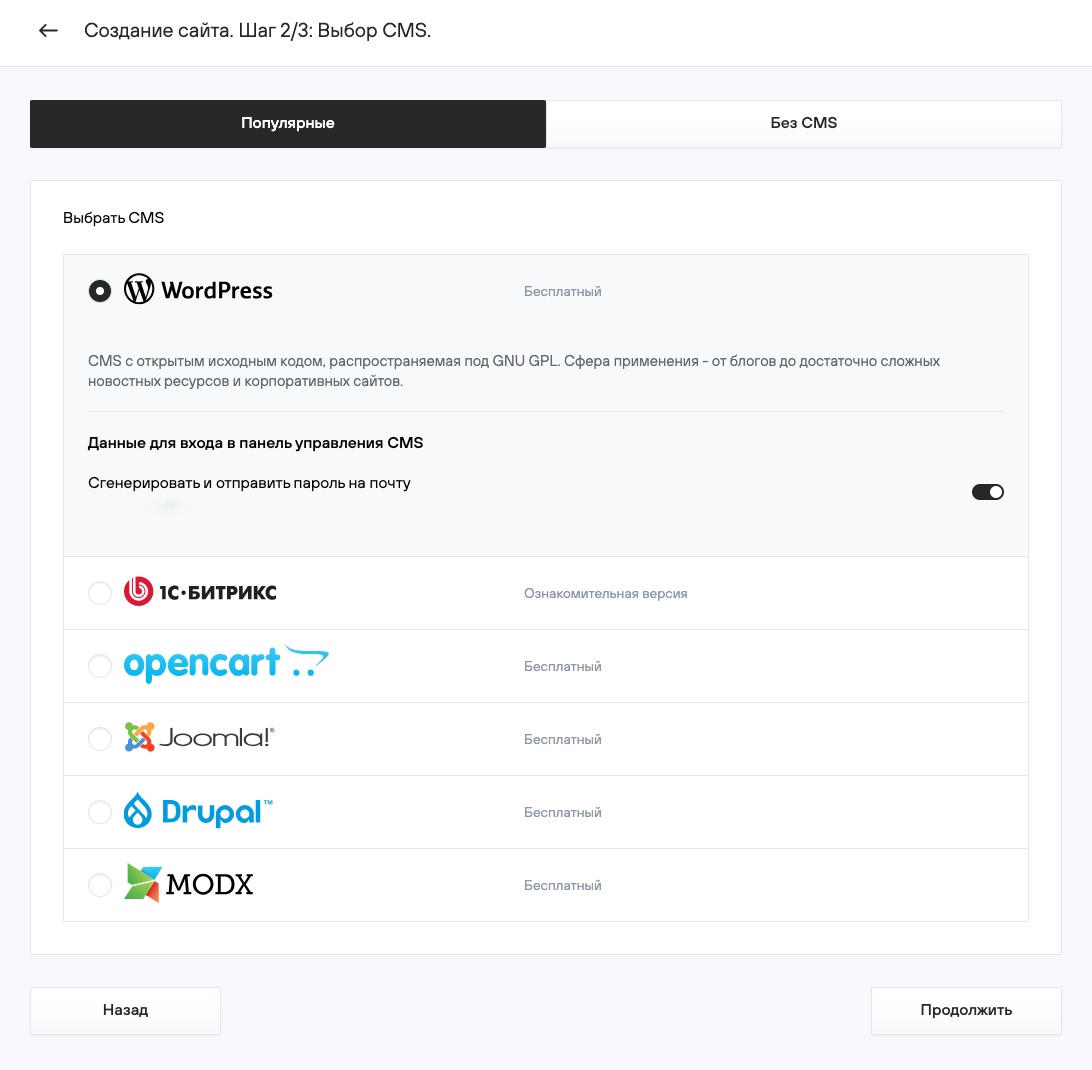
6. Select WordPress as the CMS, enter the required data for automatic installation, and click Continue (Продолжить).
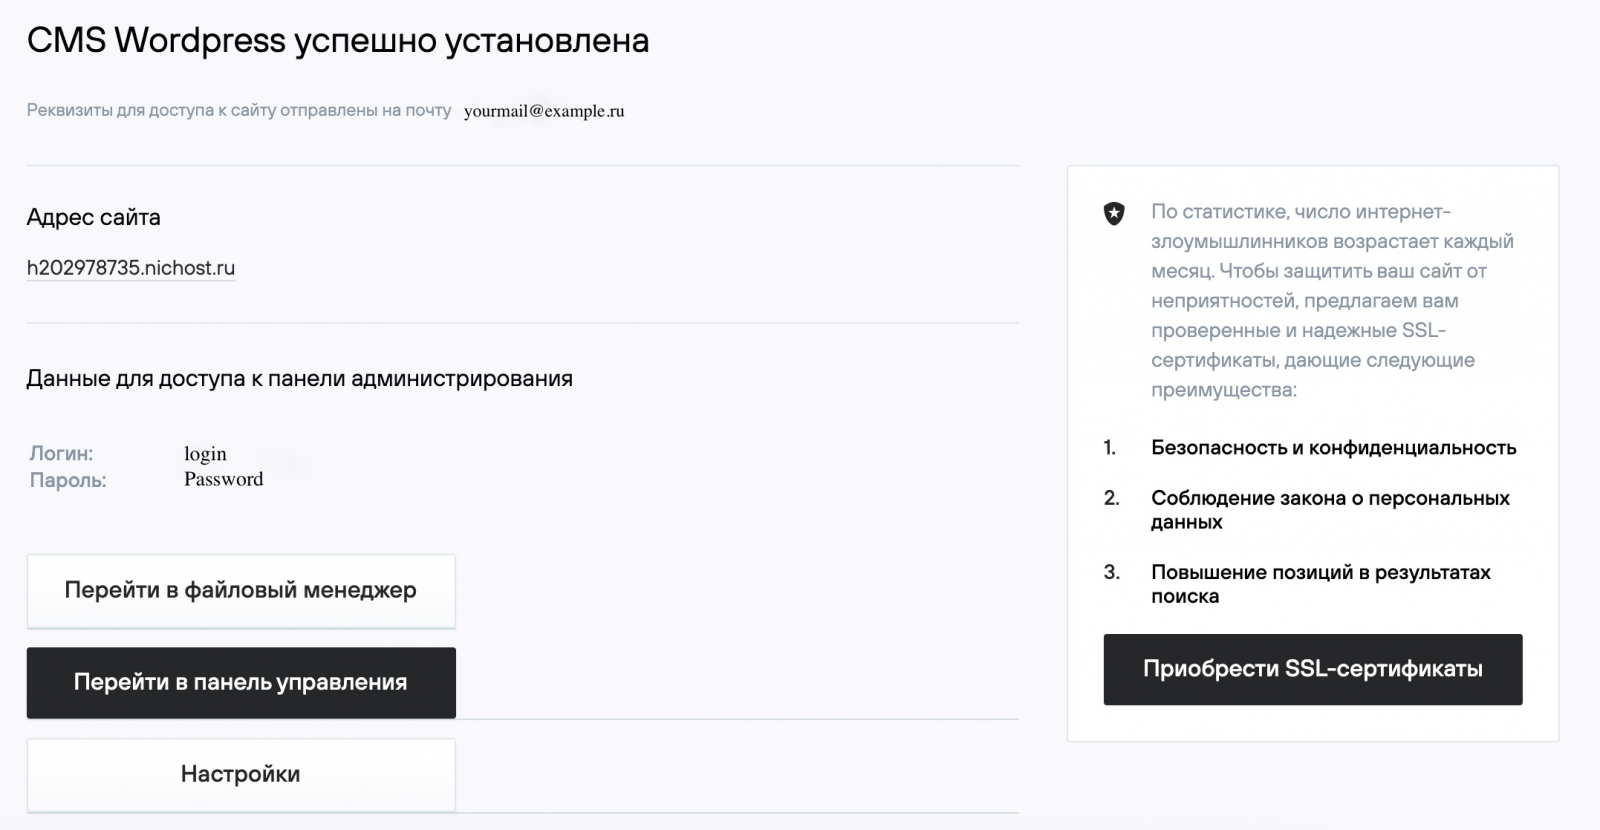
7. On the final page, you will see the main details needed to start working with the site.
8. Open your site at http://your_domain/. If the domain delegation has been completed, you will see the homepage of your site.
You can continue working on the site from the admin panel of your CMS. To access it, click the Go to control panel (Перейти в паенль управления) button.
9. On the login page, enter your username and password, then click Log In.
.png)
10. Further instructions on configuring WordPress and managing your website can be found at https://ru.wordpress.org/.
2. Additional information
When installing WordPress on the hosting, the latest PHP version is enabled with the following extensions:
- curl
- gd
- hash
- mbstring
- mysql
- session
- timezonedb
- xml
- zlib
When installing additional modules (plugins) for WordPress, you may need to enable extra PHP extensions. You can find the required list of extensions in the module’s (plugin’s) documentation or from its developer.
Managing WordPress via the Hosting Control Panel
To administer WordPress through your hosting control panel, use the instructions.