Automatic installation of 1C-Bitrix
1. Creating a website
2. Support for multiple websites
3. Additional information
1. Creating a website
1. First, you need to point your domain to the hosting according to the instructions. If the domain name is not yet registered, you can use the service (temporary) name.
2. Log in to the hosting control panel using your contract number and password.
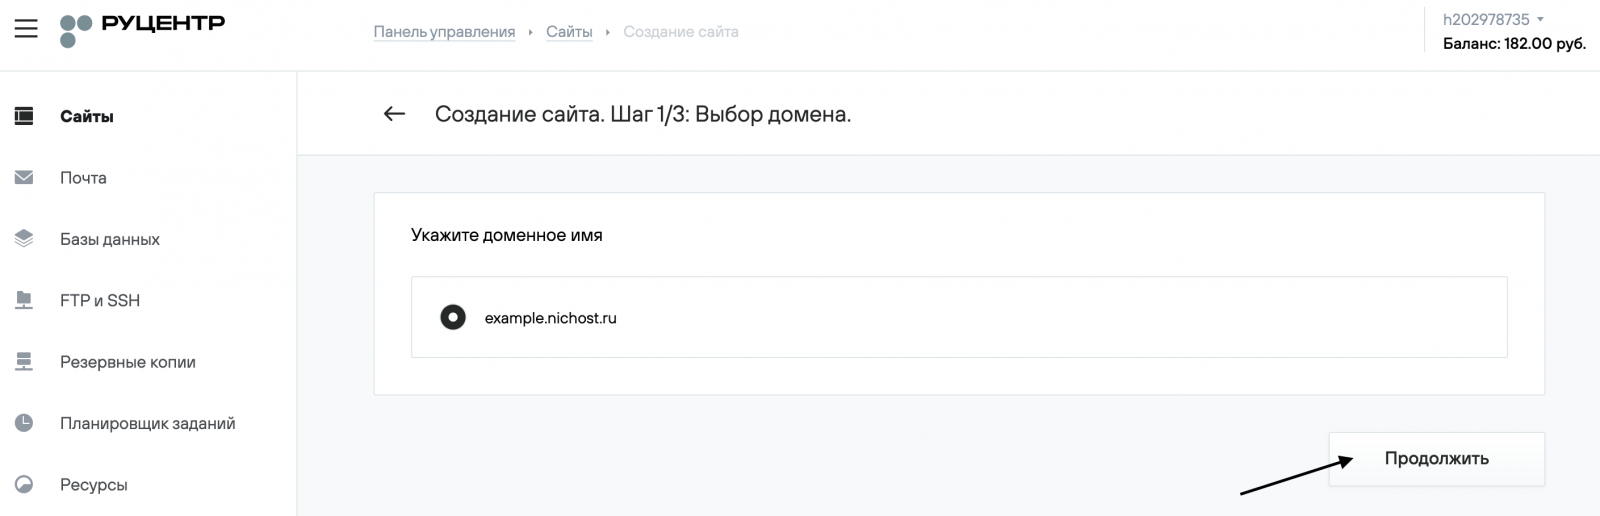
3. Go to the Sites (Сайты) section.
4. Click the Create Site (Создать сайт) button in the top right corner.

5. Choose a domain from the list of domains registered under your contract or enter the site name manually, then click Continue (Продолжить).
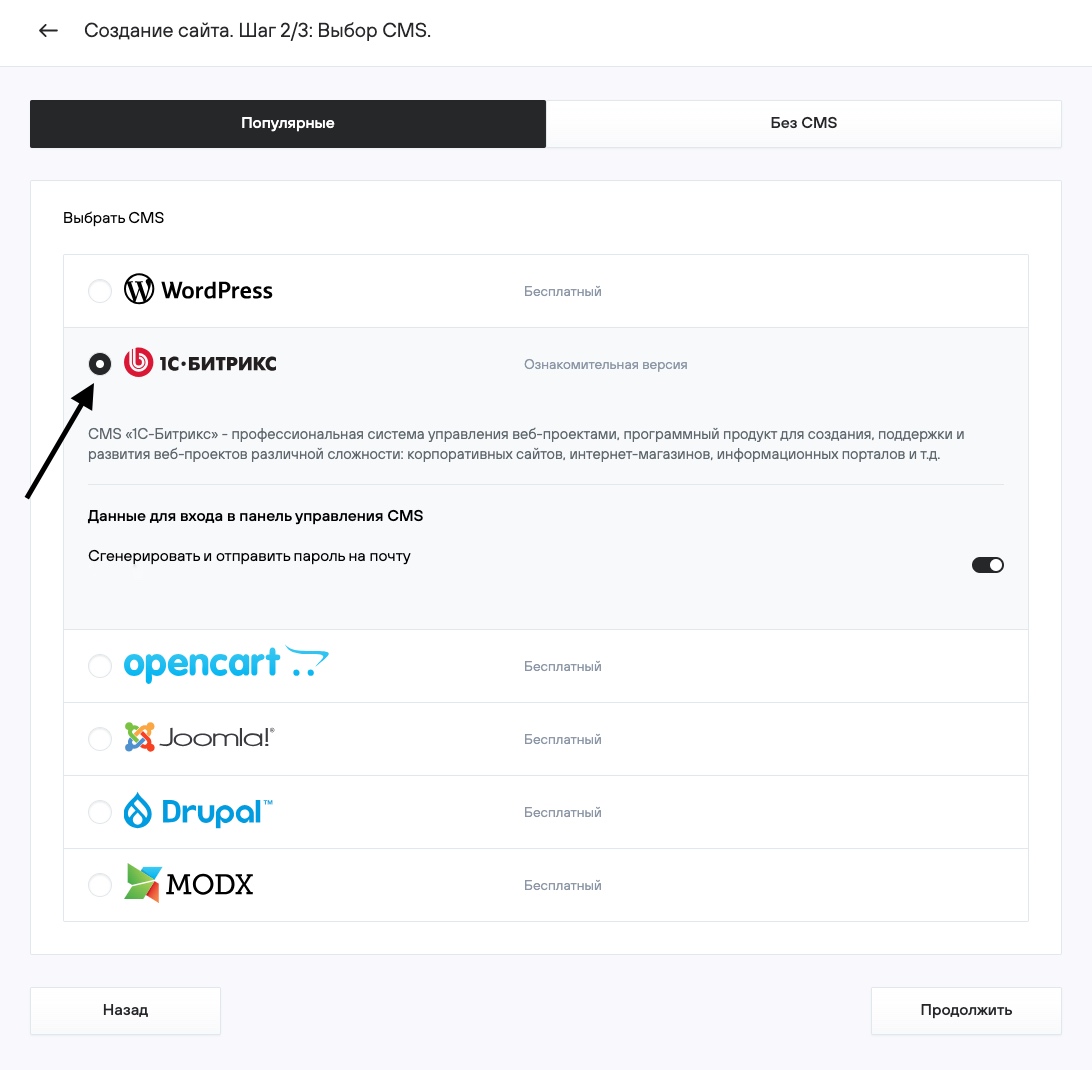
6. Select CMS Bitrix, then enter the required data for automatic installation and click Continue.
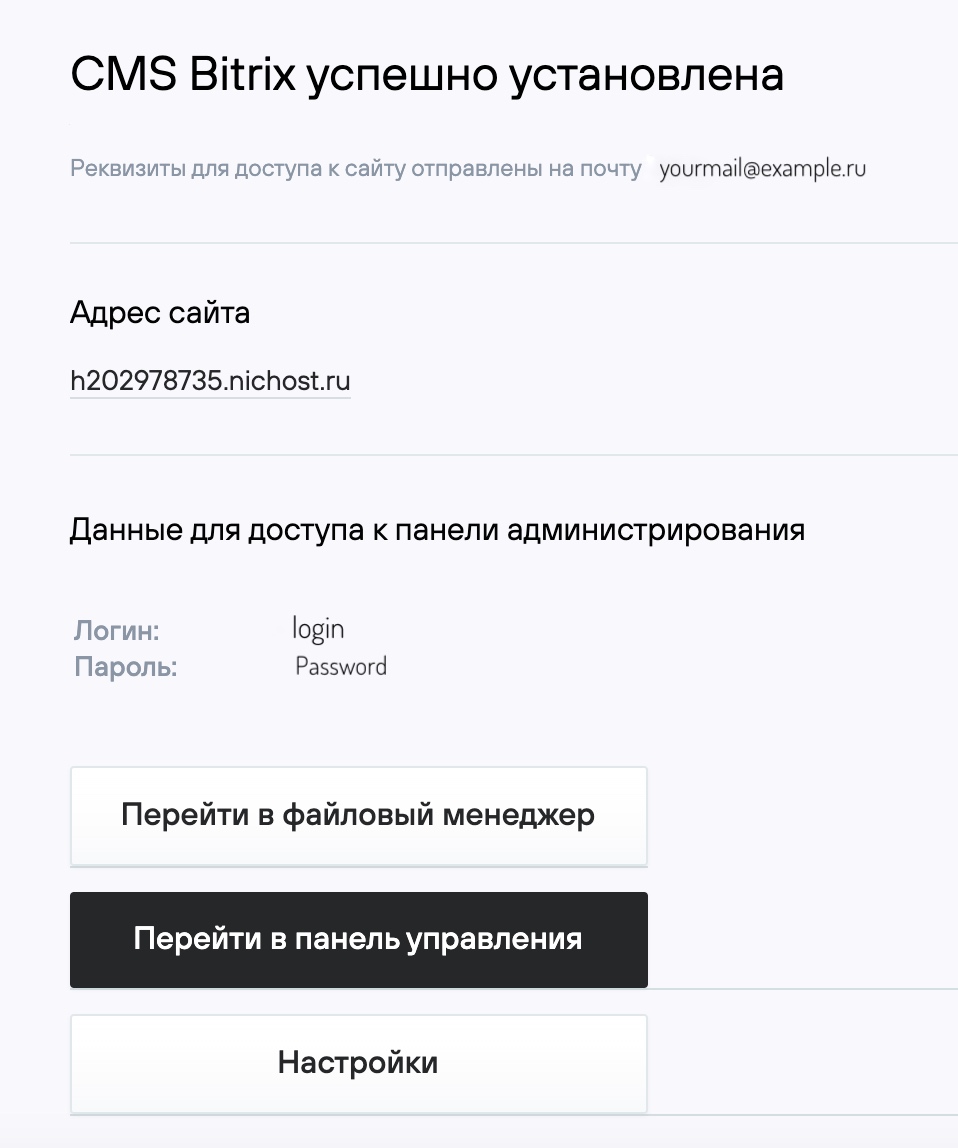
7. On the final page, you will see the main details needed to start working with the site.
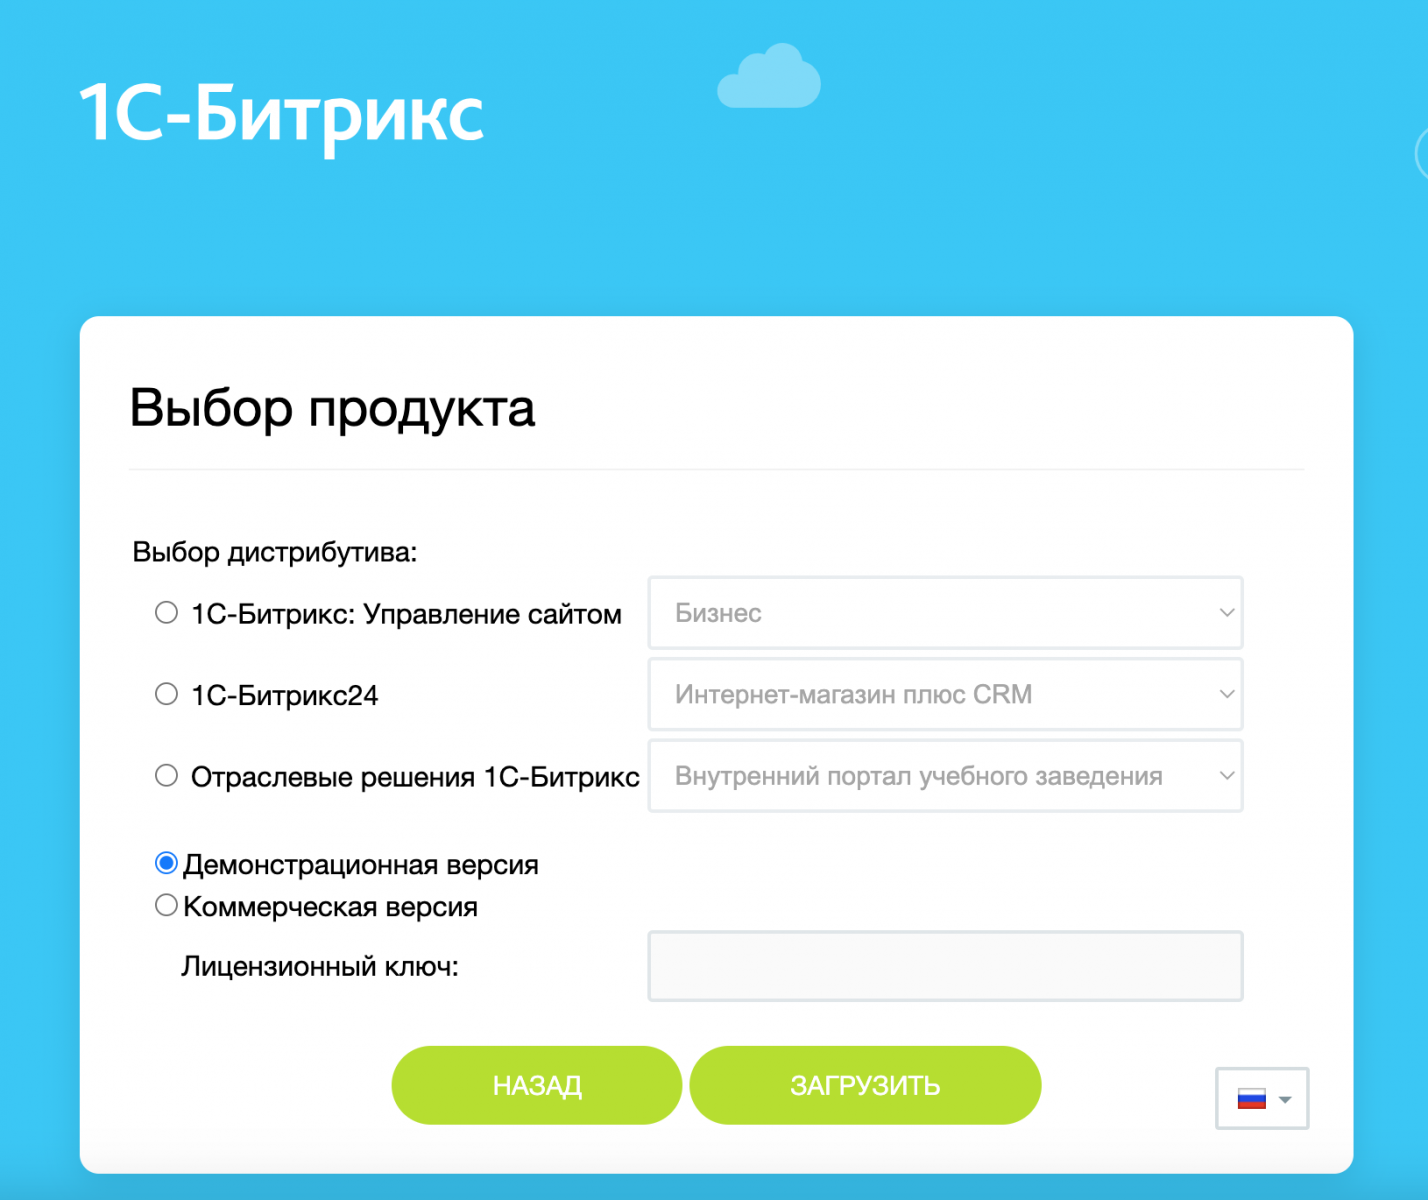
8. Open your site in a browser at http://your_domain/. If the domain delegation is complete, you will see the distribution selection page and can continue the installation.
9. Further instructions for configuring «1C-Bitrix» and working with the site can be found on the website: http://www.1c-bitrix.ru.
2. Support for multiple websites
The «1C-Bitrix» hosting plan is intended for a single installation of the «1C-Bitrix: Site Management» CMS.
Support for multiple websites can be implemented using the multisite feature in «1C-Bitrix».
If multiple websites with different CMSs are hosted on the same account, to ensure stable performance you must disable caching via the OPcache module on all sites except one.
This can be done in the .htaccess file with the directive:
php_flag opcache.enable 0
3. Additional information
1. Installing «1C-Bitrix» with UTF-8 encoding
If you want to install the product using UTF-8 encoding, in the hosting control panel go to Web Server Management — PHP Module Management and change the PHP module parameters:
- Function overloading level (mbstring.func_overload) — 2
- Internal encoding (mbstring.internal_encoding) — UTF-8
2. Enabling persistent database connections
To improve website performance, in the configuration file of the «1C-Bitrix» CMS (your_domain/docs/bitrix/php_interface/dbconn.php), set the parameter DBPersistent to true instead of false.
3. Backup specifics
The hosting service performs backups of website files and databases. Backups are stored for 7 days. Restoration is available through the Backups section in the control panel. Due to the large number of files, backups do not include directories containing the «1C-Bitrix» CMS cache:
your_domain/docs/bitrix/cache/*
your_domain/docs/bitrix/managed_cache/*
your_domain/docs/bitrix/stack_cache/*
your_domain/docs/bitrix_personal/cache/*
your_domain/docs/bitrix_personal/managed_cache/*
your_domain/docs/bitrix_personal/stack_cache/*
When restoring a site from a backup, these directories are automatically recreated by the “1C-Bitrix” CMS.
For proper backups, we recommend not changing the cache directory paths used by “1C-Bitrix” and not storing other data in these directories.
4. PHP configuration
When installing the «1C-Bitrix» CMS on the hosting, the latest version of PHP is enabled with the following extensions:
- ctype
- curl
- filter
- gd
- hash
- iconv
- json
- mbstring
- mcrypt
- mysql
- mysqli
- OPcache
- openssl
- session
- simplexml
- sockets
- timezonedb
- tokenizer
- xml
- zip
- zlib
When installing additional modules (plugins) for «1C-Bitrix», you may need to enable additional PHP extensions. You can find the required list of extensions in the module’s (plugin’s) documentation or from its developer.