Creating Email Accounts on a Domain
- Configuring a Domain to Work with Hosting
- Creating an Email Domain
- Changing Email Account Passwords and Settings
- Reading Email
- Importing Contacts into the Web Interface
- Basic Mail Server Settings
- Configuring Popular Email Clients (Outlook, Thunderbird, etc.)
Configuring a Domain to Work with Hosting
See the article “How to point a domain to hosting”?
Creating an Email Domain and Mailboxes
1. Log in to the hosting control panel using your agreement number and password.
2. Go to the Mail (Почта) section.
3. Click Create new mailbox (Создать новую почту) in the top-right corner.

4. In the Select Domain (Выберите домен) section, choose a domain from the list of domains registered under your agreement, or enter a domain name manually by selecting New Domain (Новый домен). Then specify the mailbox name and password, and click Create (Создать).
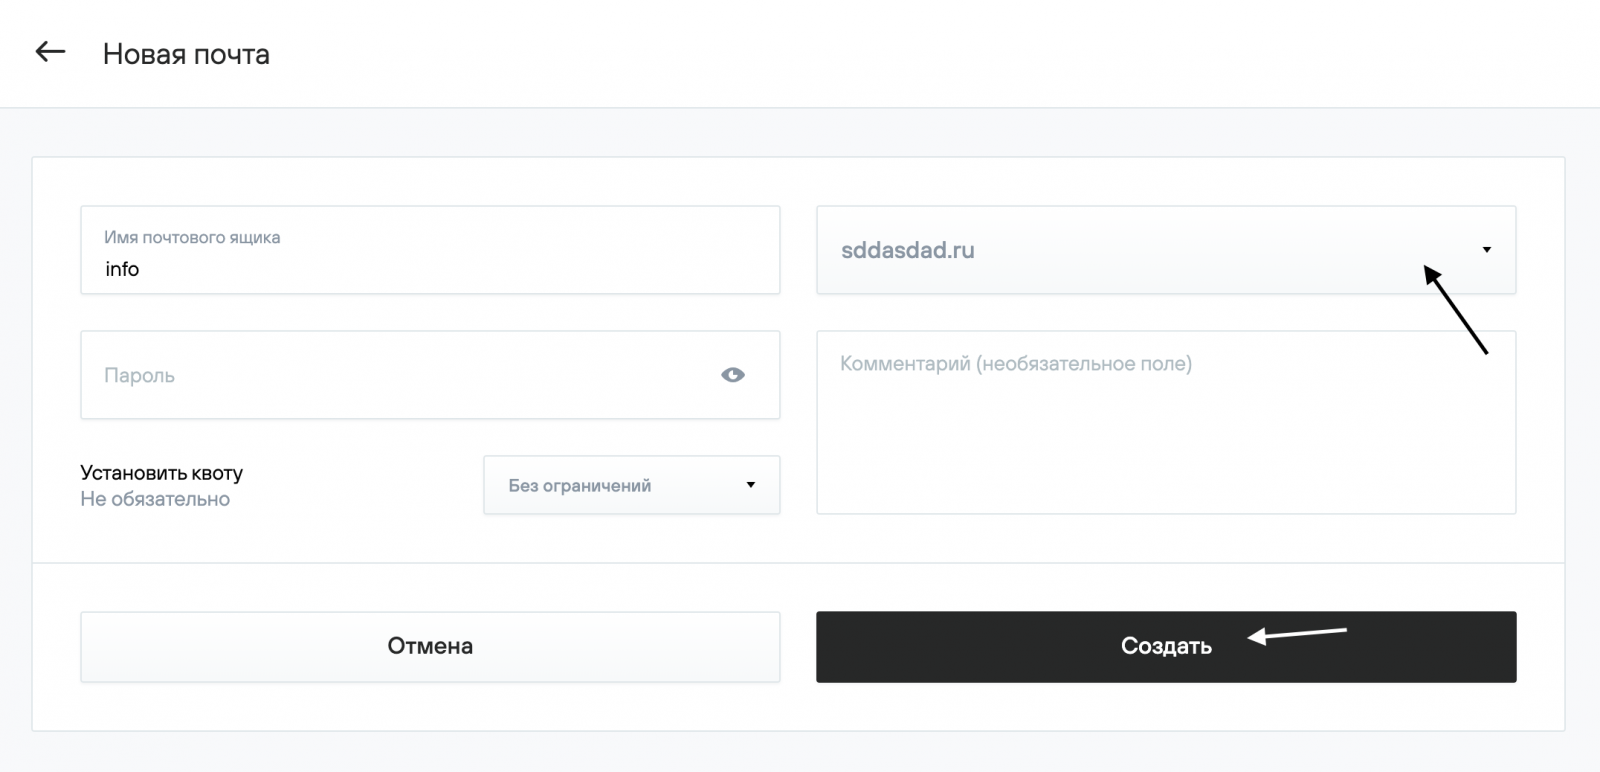
5. Additional mailboxes are created in the same way. When creating a mailbox, you must select the domain under which it will operate.

Changing Email Account Passwords and Settings
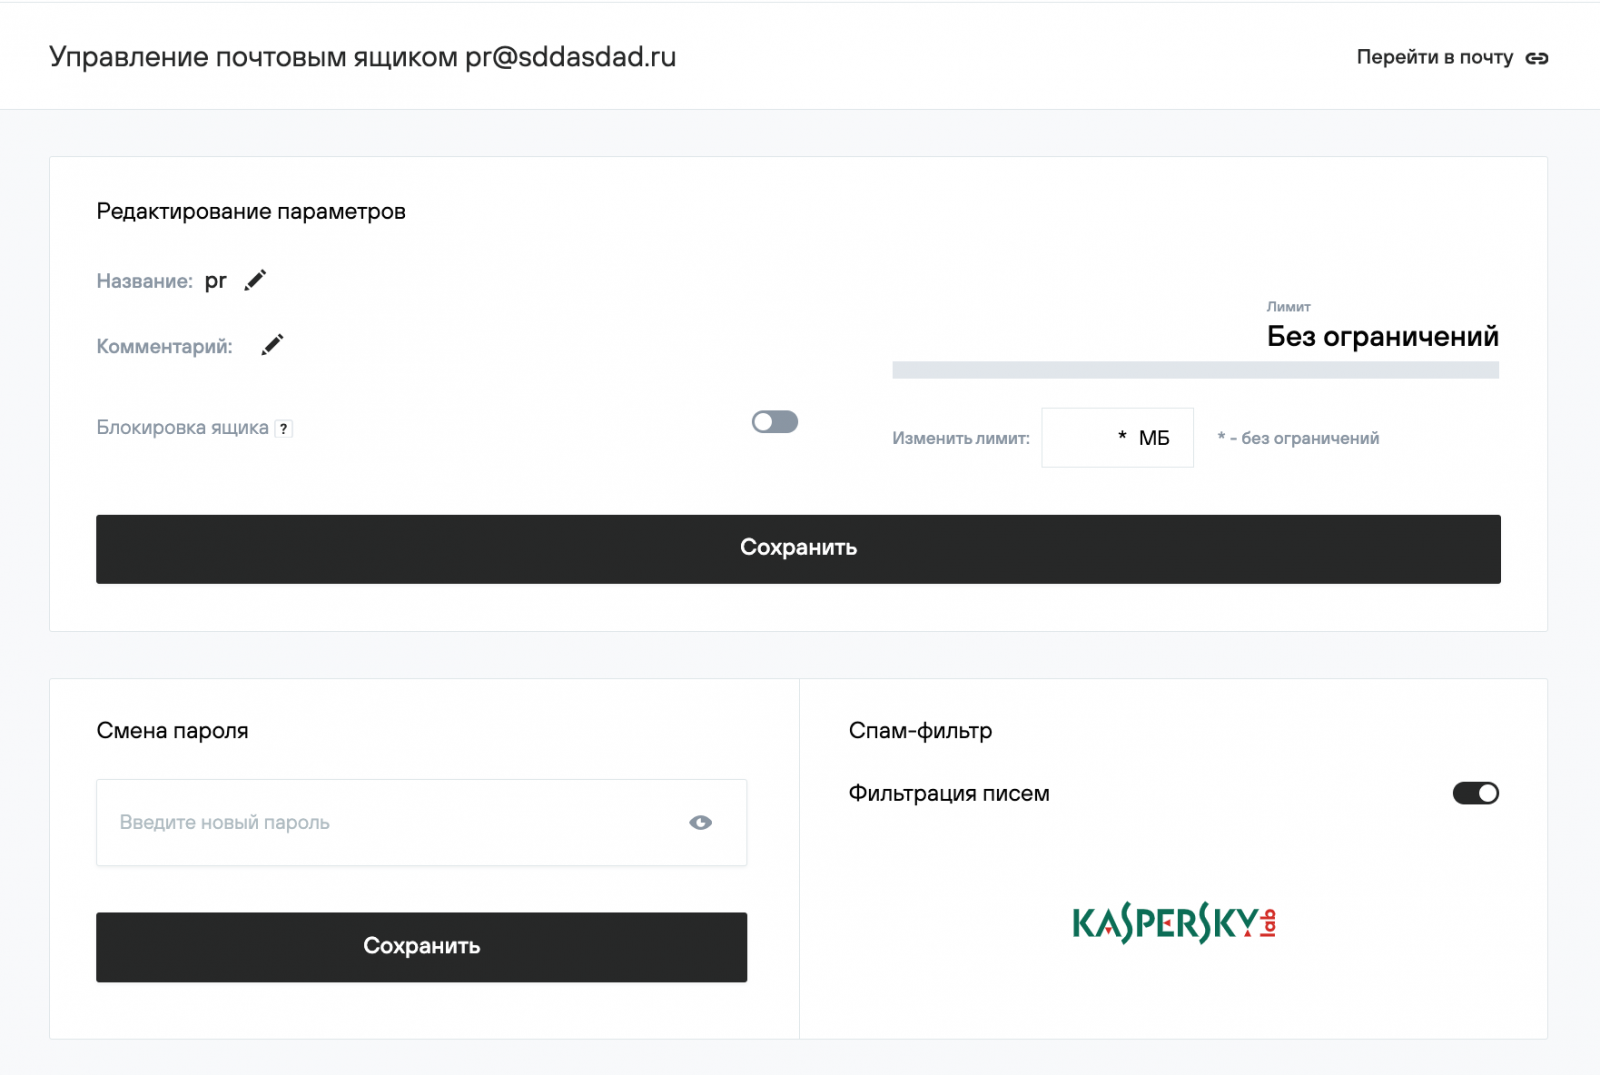
1. In the hosting control panel, go to Mail (Почта) → your_domain → Mailboxes (Почтовые ящики), then click the mailbox name to open its settings. On the settings page, you can add a short description (comment), add aliases, set a disk space quota (limit), and change the current mailbox password.
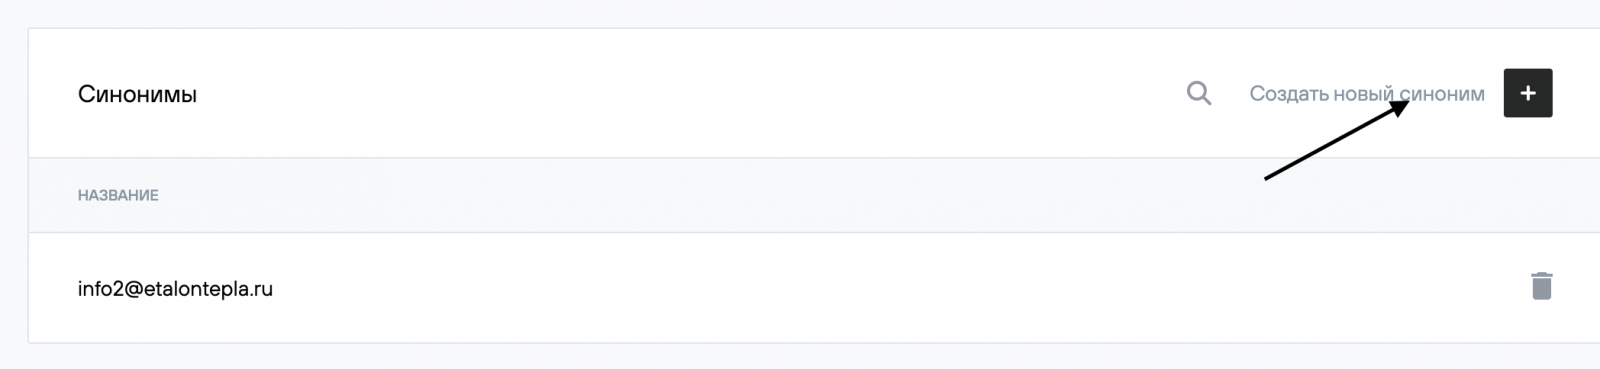
2. In the Aliases (Синонимы) section, you can add an email alias. For example, the mailbox mail@example.com has the alias mail1@example.com. As a result, emails sent to both mail@example.com and mail1@example.com will be delivered to the same mailbox.
3. A mailbox user can change their password independently in the webmail interface at mail.nic.ru under Settings (Настройки) → Password (Пароль).
.png)
Reading Email
If you use an email client (for example, Outlook), configure it according to the provided instructions. If you do not use an email client, you can access your email via the webmail interface: To do this:
- Go to https://www.mail.nic.ru/
- Enter your email address and password, then click Log in.
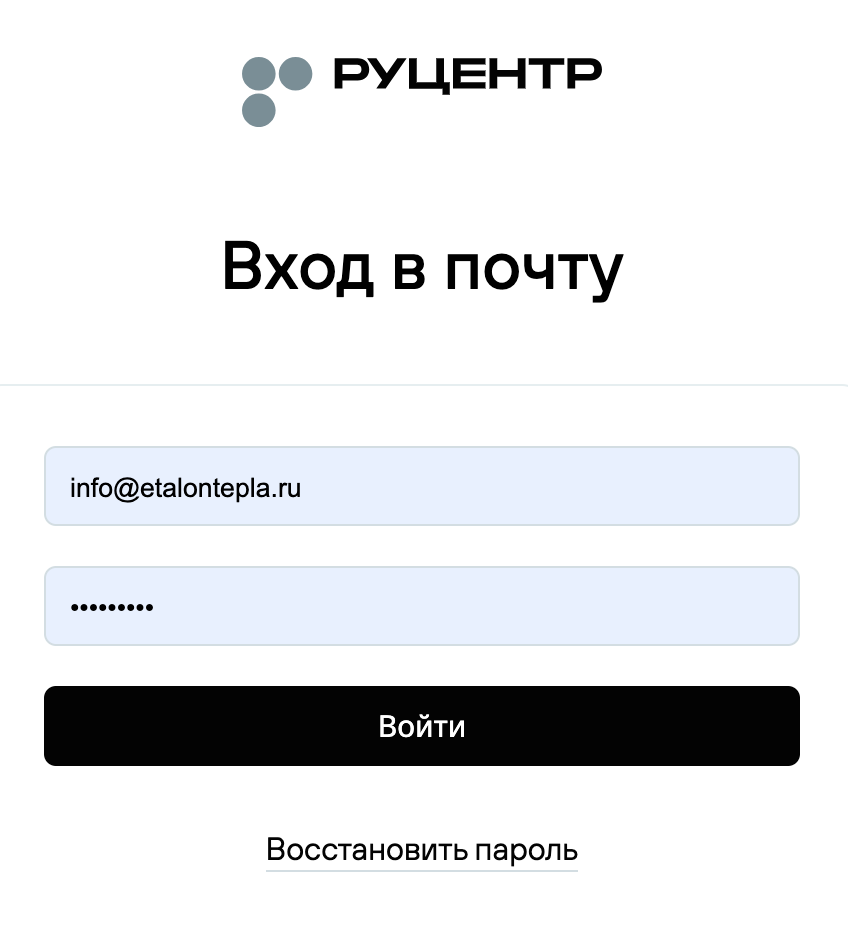
- You will be taken to the webmail interface.
.png)
Importing Contacts into the Web Interface
To import a contact list:
1. Open the webmail interface.
2. Enter your email address and password, then click Log in.
3. Go to the Contacts (Контакты) section.
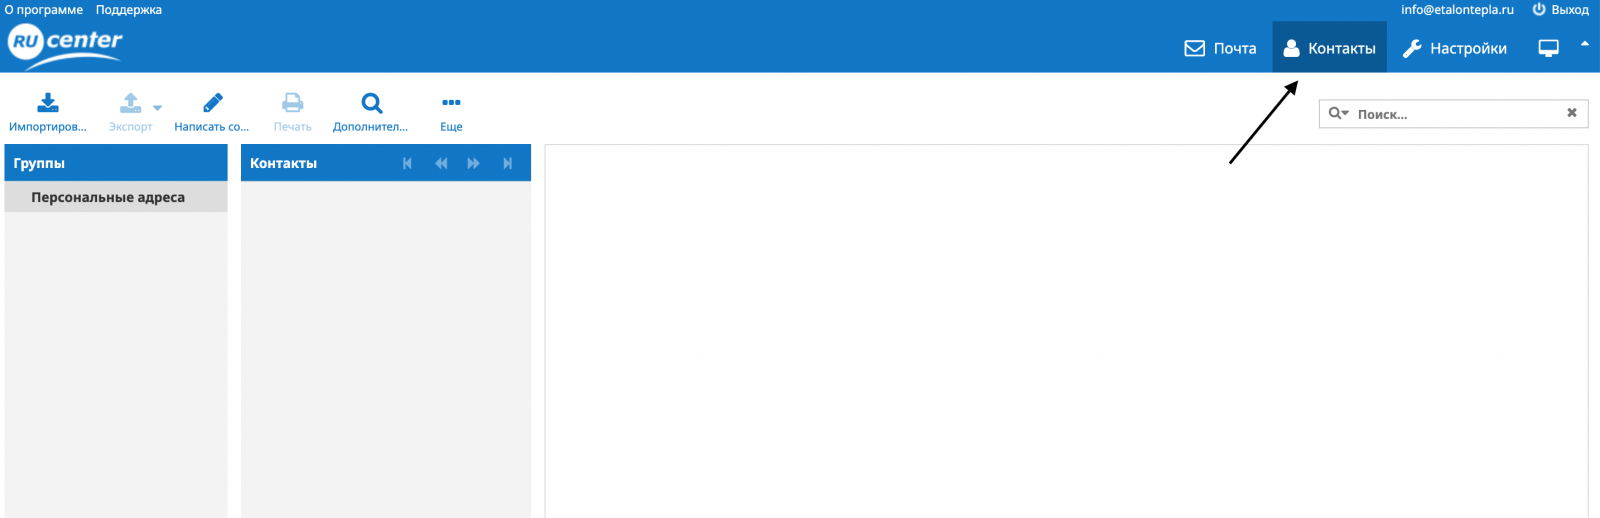
4. Click Import (Импортировать).

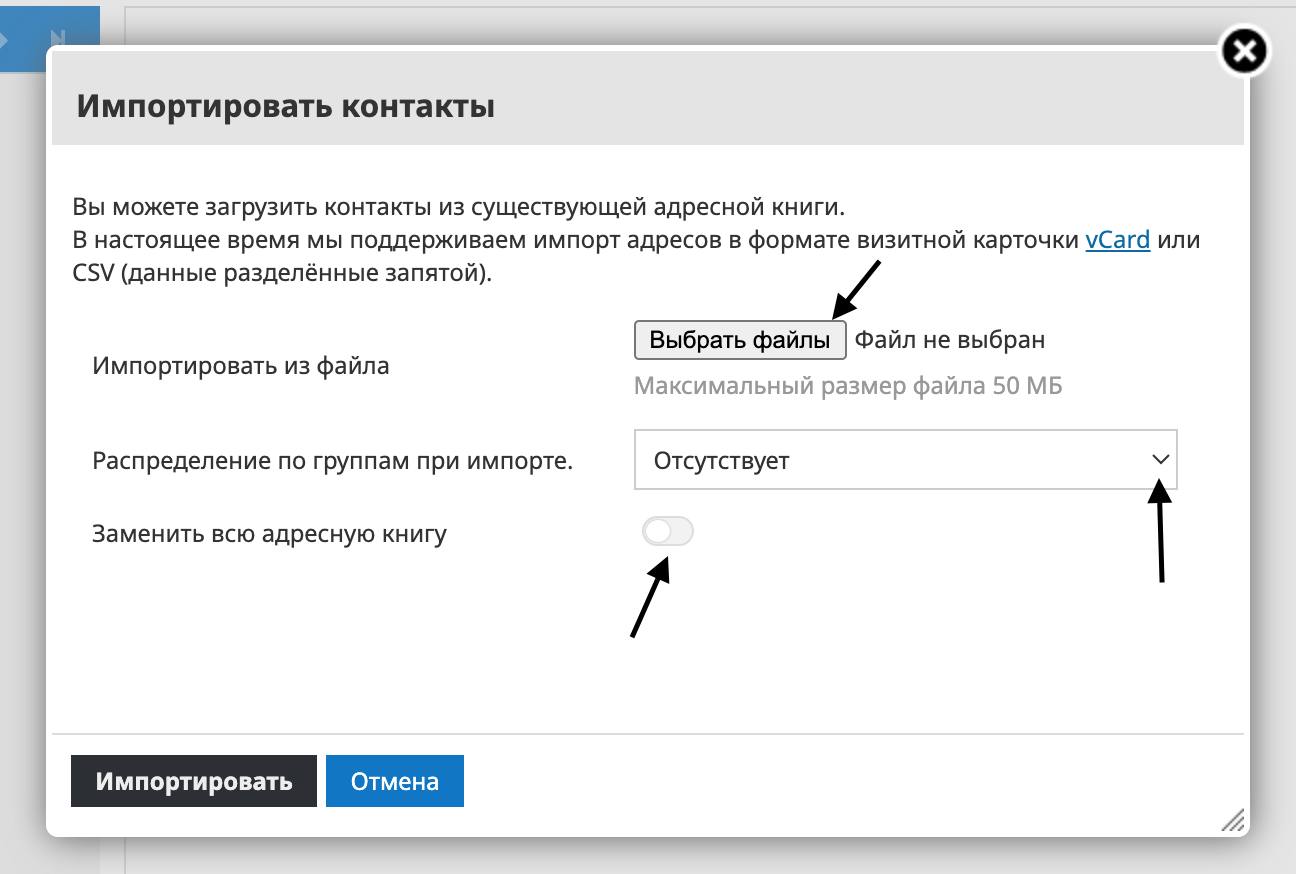
5. Click Choose files (Выбрать файлы) and select the contacts file you want to import. In the Group assignment during import option, select the desired import method or leave None selected.
If necessary, enable Replace entire address book. Then click Import (Импортировать).
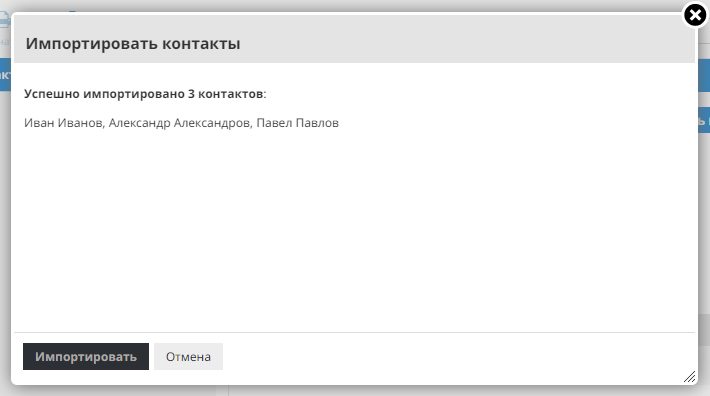
6. If the import is successful, you will see a message with the list of imported contacts. To continue working in Roundcube, click Cancel (Отмена).
Troubleshooting Contact Import Errors
An import error may occur when uploading a .CSV contacts file.
CSV files are created and edited in spreadsheet editors. In CSV files, data is stored as text separated by commas rather than in visible columns. The text consists of fields that must appear in a strict order. An import error occurs if the contact file structure (field order) is incorrect or if the file is empty.
Example of a Correctly Structured File (Exported from Gmail)
.png)
Field names may vary depending on the email client used to export contacts, but their content must remain the same.
In a Gmail-exported file, the required fields are:
- Given Name — first name
- Family Name — last name
- Group Membership — the group the contact belongs to (for example, myContacts)
- E-mail 1 – Value — the recipient’s email address
Correct File Structure for the Roundcube Mail Client
Where:
- first_name — first name
- last_name — last name
- display_name — the group the contact belongs to
- email — the recipient’s email address
To fix contact import errors in Roundcube, adjust the structure of the entire file to the correct format using the official documentation.
Mail server basic settings
To connect to the mail server, use the following settings:
|
Server setting |
Server name |
Connection port |
Encrypted connection port (SSL) |
|
IMAP server (incoming mail) |
mail.nic.ru
|
143
|
993
|
|
POP3 server (incoming mail) |
mail.nic.ru
|
110
|
995
|
|
SMTP server (outgoing mail) |
mail.nic.ru |
587, 25 или 2525
|
465
|
As a user name the full name of the mailbox is specified. For example, info@your_domain.
SMTP authentication is required. Use the same username and password as for receiving email.