Email Settings — Aliases, Filters, Forwarding and More
Creation and management of email accounts is performed in the Mail section of the hosting control panel.
Main Email Domain Settings
Select the email domain and go to the Settings tab.
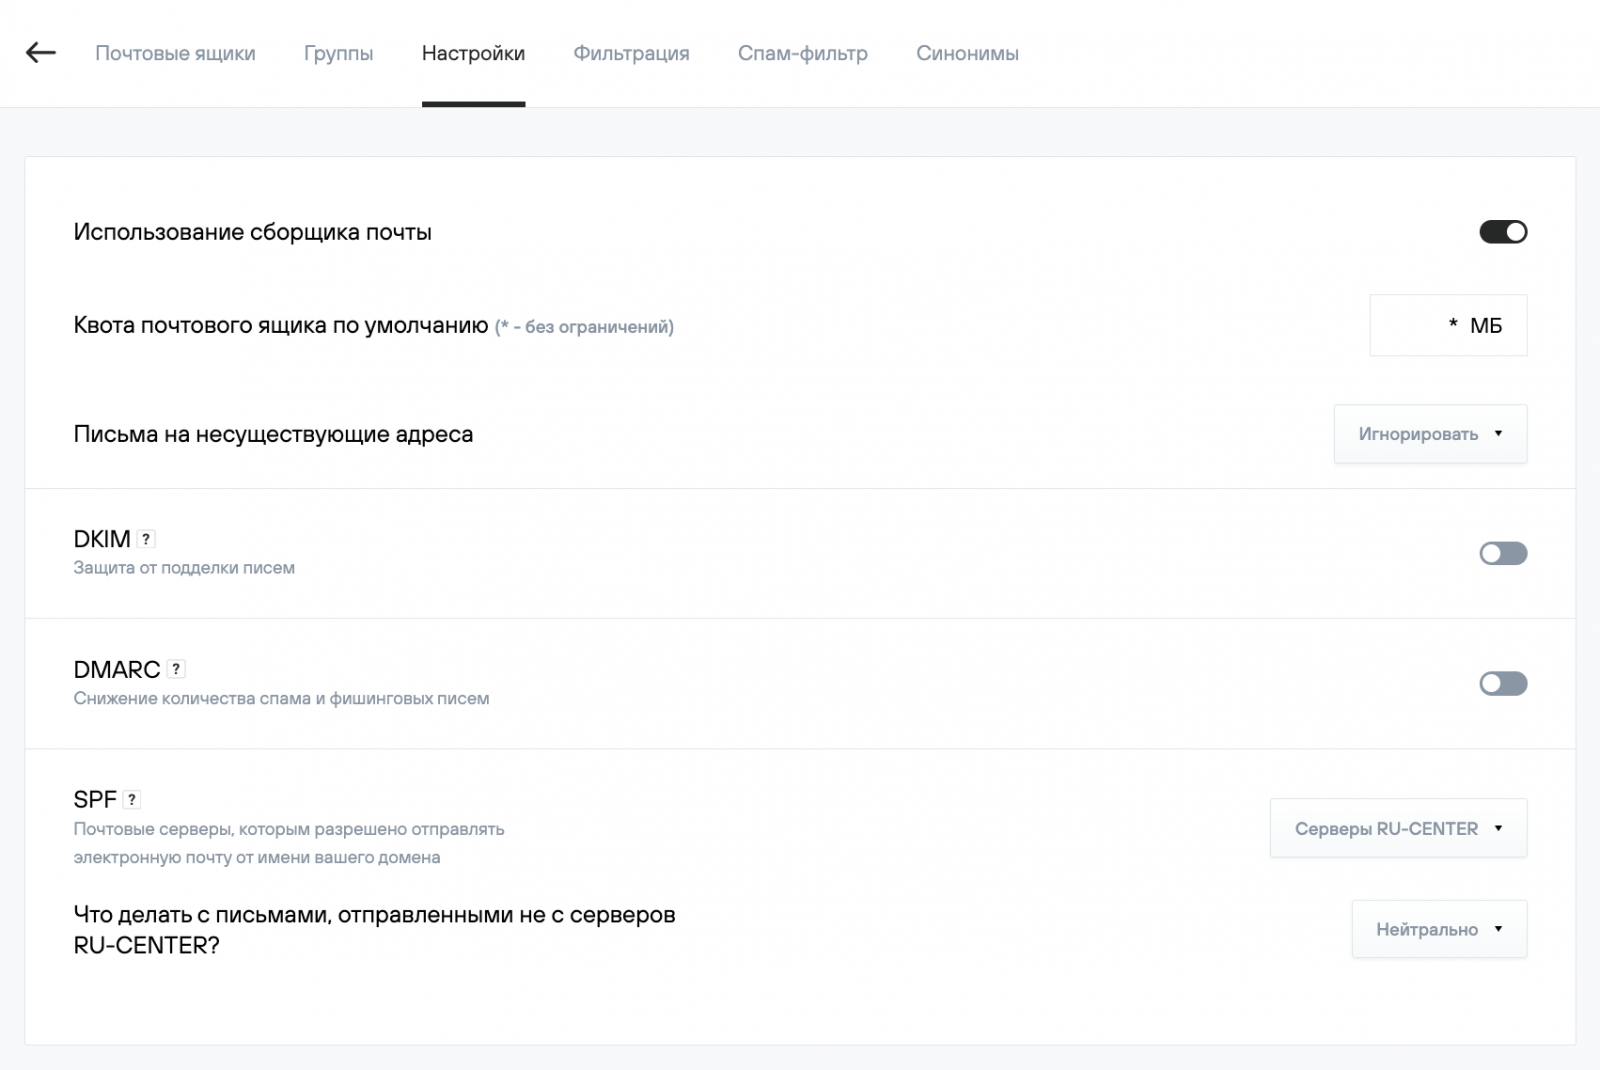
The following options are available on this page:
- Use mail fetcher. Allows the use of a mail fetcher for external email addresses in the web interface of the domain’s mailboxes.
- Manage local filters. Allows creating rules (filters) in the web interface of the domain’s mailboxes.
- Mail to non-existent addresses. Allows you to configure how email sent to non-existent addresses is handled.
- Ignore. Messages will not be accepted, and the sender will not receive a non-delivery notification.
- Return to sender. Messages will be returned to the sender with information that the specified addresses do not exist.
- Forward to. Messages will be accepted and forwarded to the selected address within your domain.
- The “Record information” section contains the DNS resource records that must be added to your domain zone if you manage the DNS zone yourself.
Aliases
Select the email domain and go to the Aliases (Синонимы) tab. The following options are available on this page:
- Create a new alias. Adds a new mail server alias. In this example, the alias example.net is added for the mail server example.com. An email sent to user@example.net or user@example.com will be delivered to the same mailbox.
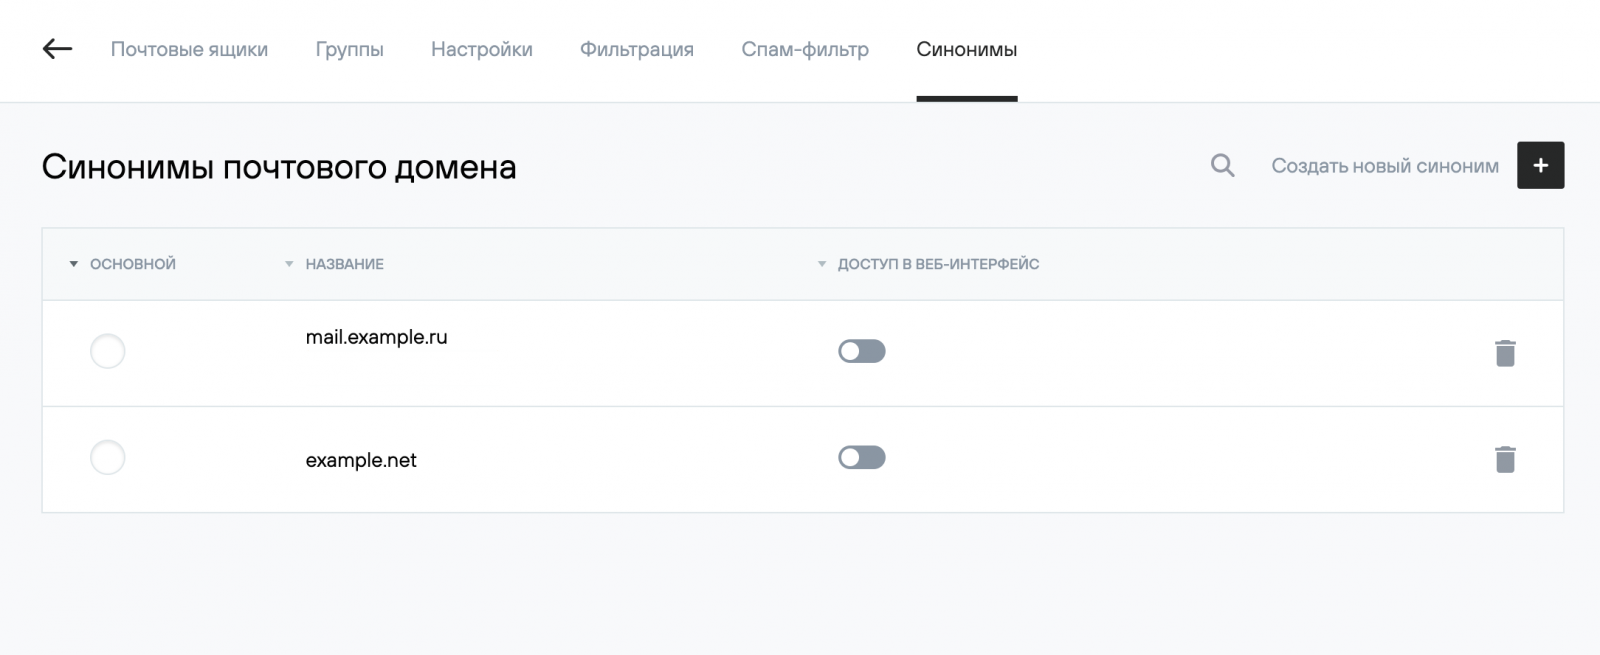
- Web interface access. In this example, this option is enabled for the mail server mail.example.com — this domain name can be specified in the email client settings as the incoming and outgoing mail server. The login page for the webmail interface will open at http://mail.example.com
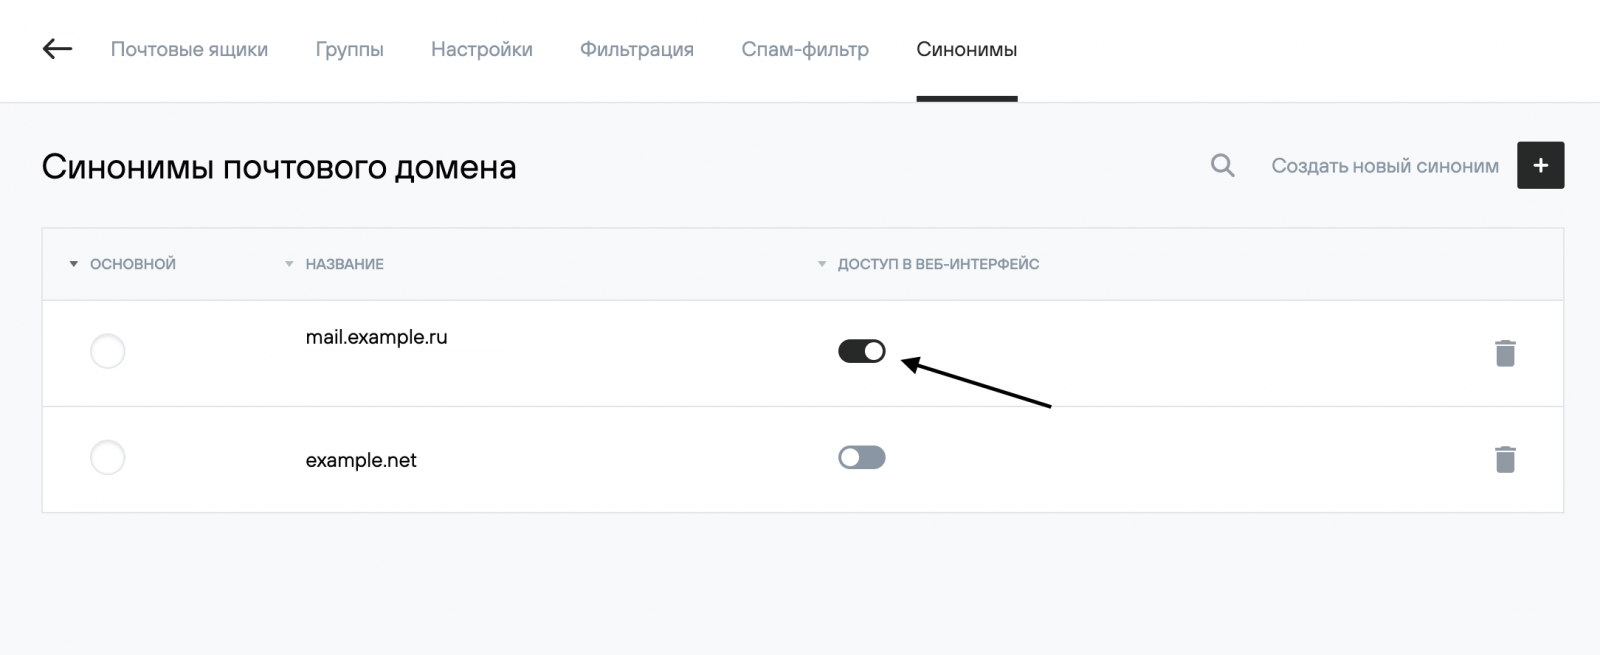
- Select primary email domain. The primary domain is used in the From address of your domain’s mailboxes after the @ symbol. Enable the switch next to an alias to make it the primary one.
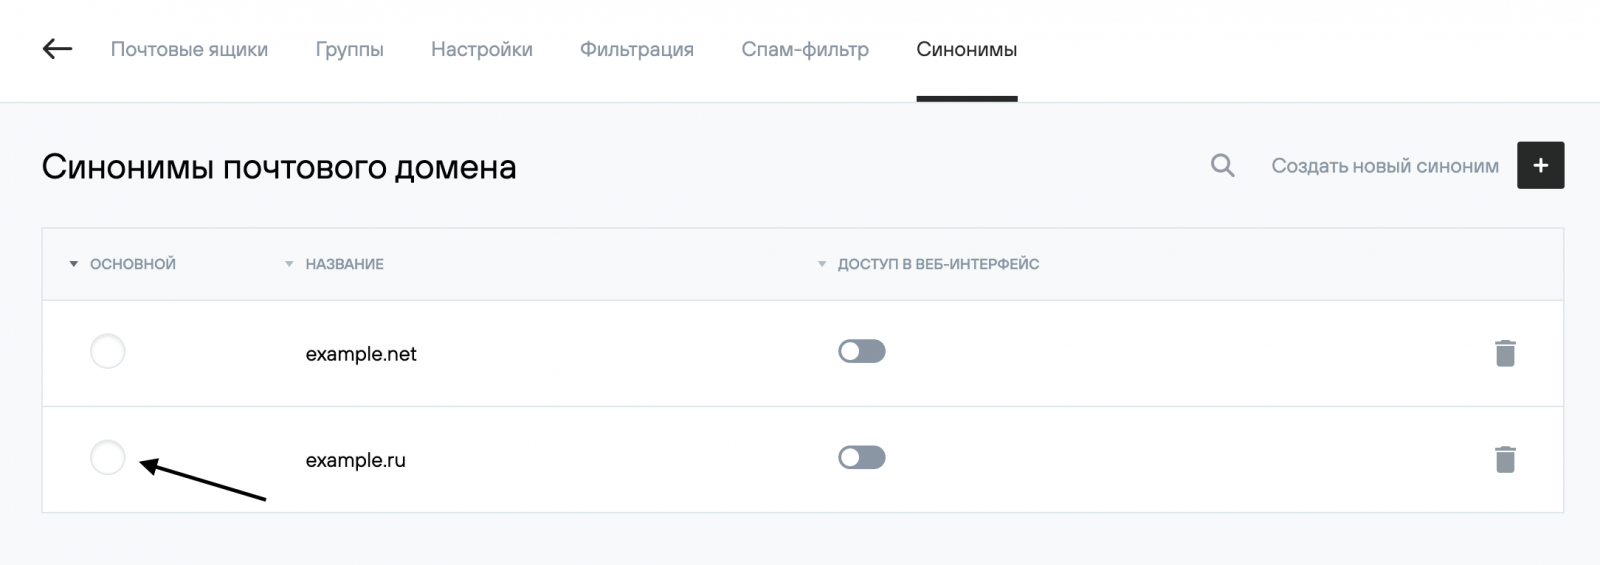
- Delete. To delete an alias, click the trash icon to the right of its name.
Filters and Forwarding
Using the hosting control panel and the webmail interface, you can create email processing rules based on specific conditions, referred to as filters.
There are two types of filters:
- global — applied to the entire domain;
- local — applied to a specific mailbox.
In addition, the hosting platform provides a number of additional settings and special filters for email management.
- Configuring forwarding (redirection) of incoming email
- Global filters
- Examples of common filters
- Local filters
- Differences between actions in local and global filters
- Spam filter configuration
1. Configuring forwarding (redirection) of incoming email
If you need to set up forwarding between mailboxes:
- log in to the webmail interface by entering the email address and password on the page https://mail.nic.ru;
- go to Settings (Настройки) → Filters (Фильтры);
- select the inactive filter “Forwarding” (Перенаправление) from the list and enable it;
- enter the email address to which messages should be forwarded;
- click the Save button.

Please note:
- if you need to keep a copy of the message, select the filter “Forwarding (keep a copy)”(Перенаправление (Оставить копию). Forwarded messages will be stored in the mailbox and must be cleaned up periodically;
- if forwarding to two or more mailboxes is required, you can add an additional filter action by clicking the plus icon on the right;
- messages that are marked by our server as possible spam are not forwarded.
If you need to forward all messages to an external email address, you should configure a mail fetcher (RPOP) on that mailbox:
When configuring the mail fetcher, use the following parameters:
- server address: mail.nic.ru;
- account (username): the full email address, for example, mail@example.com.
2. Global filters
You can create a global filter in the hosting control panel under Mail (Почта) → Your_domain → Filtering (Фильтрация).

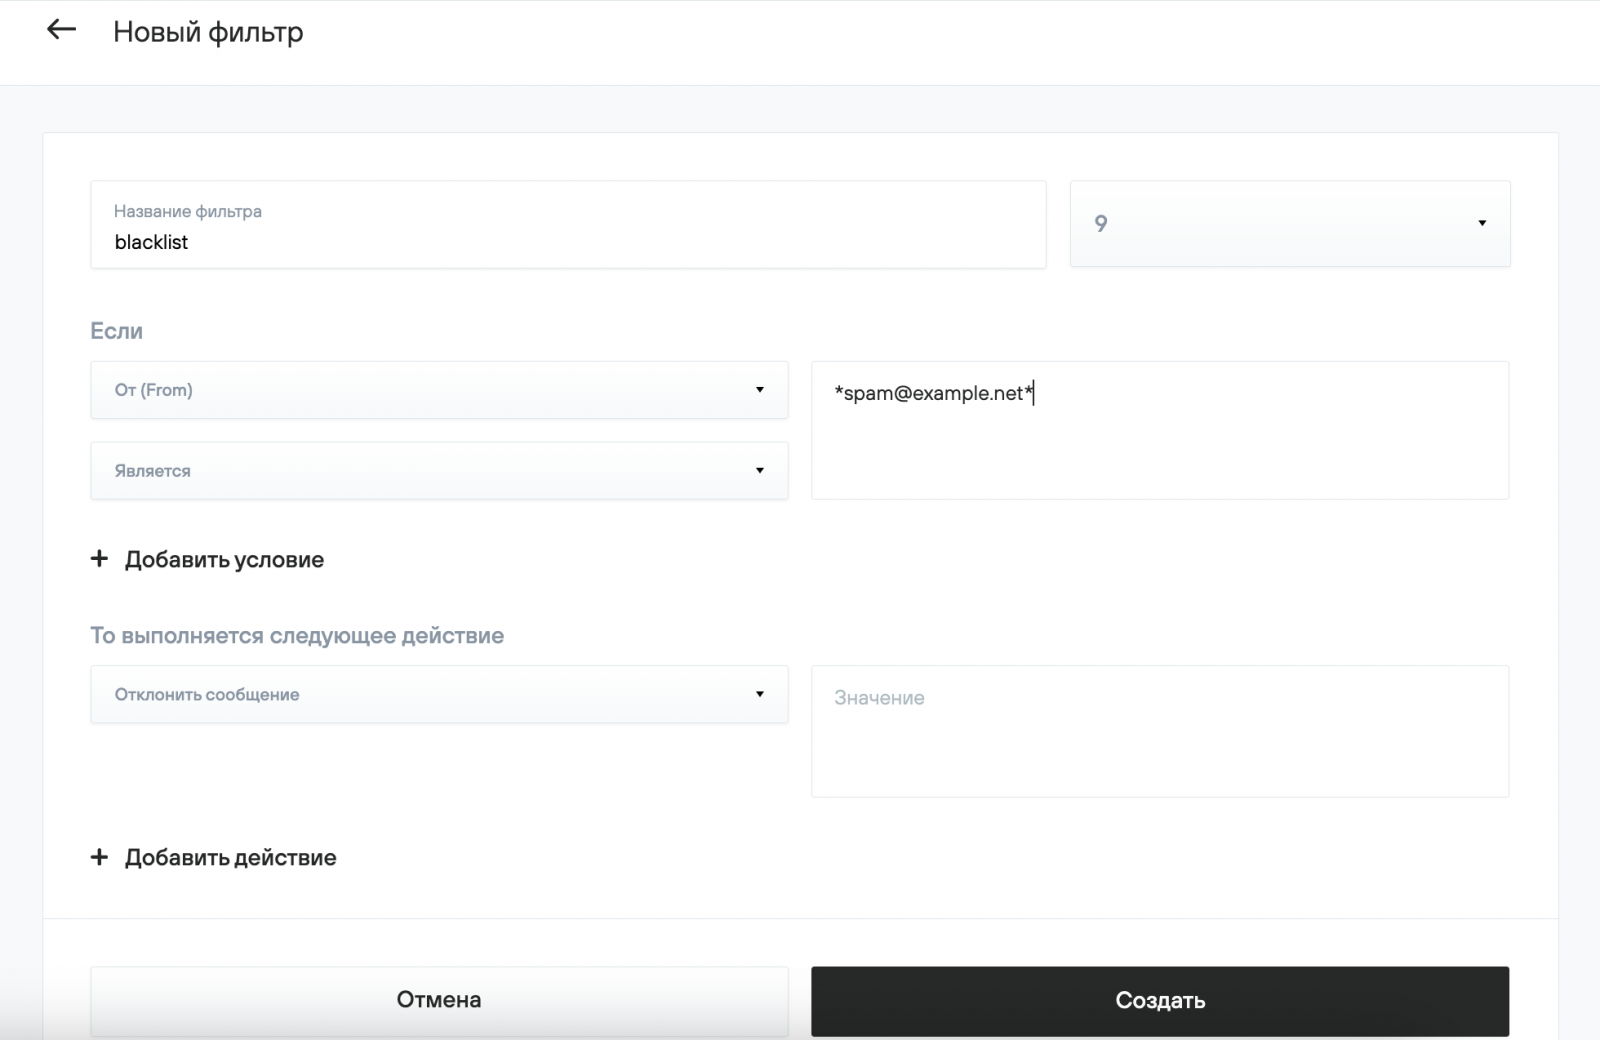
Click the Create new filter (Создать новый фильтр) button to open the filter settings page.

Specify the filter name and its execution priority. A filter with the highest priority (9) is executed first, while a filter with the lowest priority (1) is executed last.
Next, specify the conditions that an incoming message must meet for the filter to be applied. The message element or time parameter to be checked is specified in the “If” field:
- “From” — sender address (contents of the From: header);
- “To” — recipient address (contents of the To: header);
- “To or CC” — recipient addresses (contents of the To: or CC: headers);
- “Subject” — message subject (contents of the Subject: header).
The value to be matched against the selected element is specified in the “Value (Значение)” field. The type of match between the element and its value is selected in the adjacent field. The operations “is” and “is not” are used to check for an exact match with a single value. The operations “is in” and “is not in” are used to check against a list of values; the values must be separated by commas with no spaces.
In the Perform the following action (Выполняется следующее действие) section, specify the actions to be applied to the message. Click Create (Создать) to save the filter settings.
3. Examples of common filters
3.1. Deleting all emails received from a specific address
This filter deletes all messages sent to your domain from the address spam@example.net.
3.2. Deleting all emails received from specific addresses
This filter deletes all messages sent to your domain from the addresses spam@example.net, spam1@example.net, spam2@example.net

3.3. Deleting all emails with a specific subject
This filter deletes all messages whose subject contains the word spam.

3.4. Copying all correspondence received from specific addresses to an external mailbox
This filter copies all incoming messages received from any of the addresses user1@domain.ru, user2@domain.ru, user3@domain.ru to the mailbox admin@example.net.

Please note:
- the filter may not work correctly if you are forwarding mail from mail servers that enforce a DMARC policy;
- the forwarding address must be external; otherwise, this may result in a filtering loop.
4. Local filters
You can create a local filter in the webmail interface under Settings → Filters (Настройки → Фильтры).
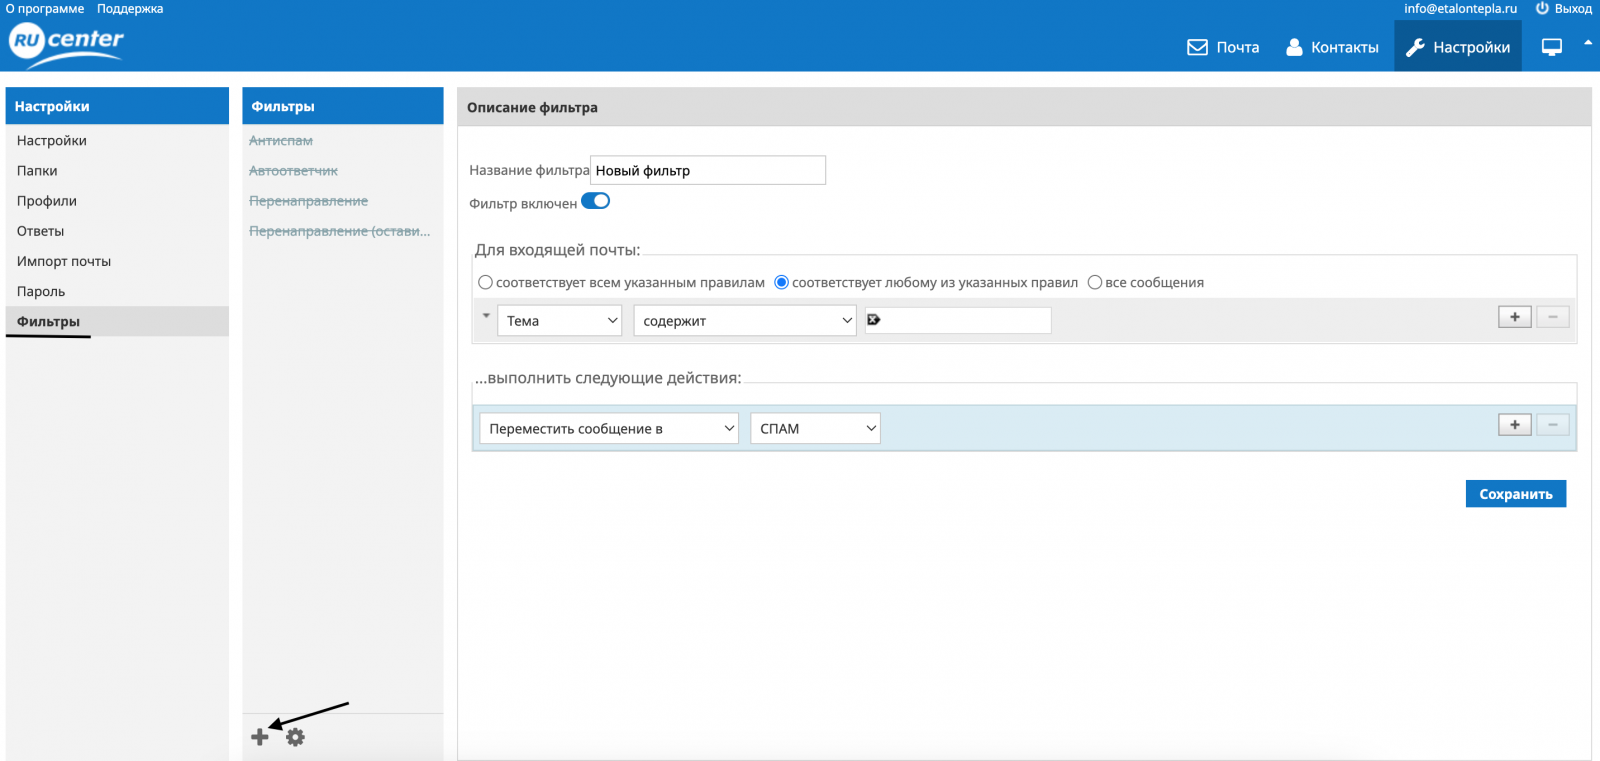
In the Filter name (Название фильтра) field, enter the name of the filter, configure the required settings, and click the Save (Сохранить) button. The rules and actions are the same as those used for global filters.
5. Specific behavior of actions in local and global filters
For the same message, the actions “Reject with message” and any other local or global filter actions cannot be applied at the same time. The “Reject with message” action implies refusing delivery of the email; therefore, any actions related to forwarding, saving the message to folders, and similar operations are not compatible with the “Reject with message” action. If a situation occurs where, according to the conditions of configured local and/or global filters, the mail server would have to perform actions related to saving or forwarding the message in addition to “Reject with message” filter processing for that message will be stopped and the message will be delivered to the Inbox (Входящие) of the mailbox to which it was sent.
6. Spam filter configuration
The hosting platform uses a spam filter provided by Kaspersky Lab. When an email domain is created, the spam filter is enabled automatically.
You can enable or disable email filtering for a domain in the hosting control panel under Mail (Почта) → your_domain → Spam filter (Спам-фильтр). When filtering is enabled, messages identified as spam are delivered to the Spam folder of the mailbox and are deleted after 30 days. The Spam folder is available when accessing the mailbox via the web interface and via the IMAP protocol.

You can enable or disable email filtering for an individual mailbox in the hosting control panel under Mail (Почта) → your_domain → your_mailbox → Spam filter (Спам-фильтр).
Adding a domain to the whitelist
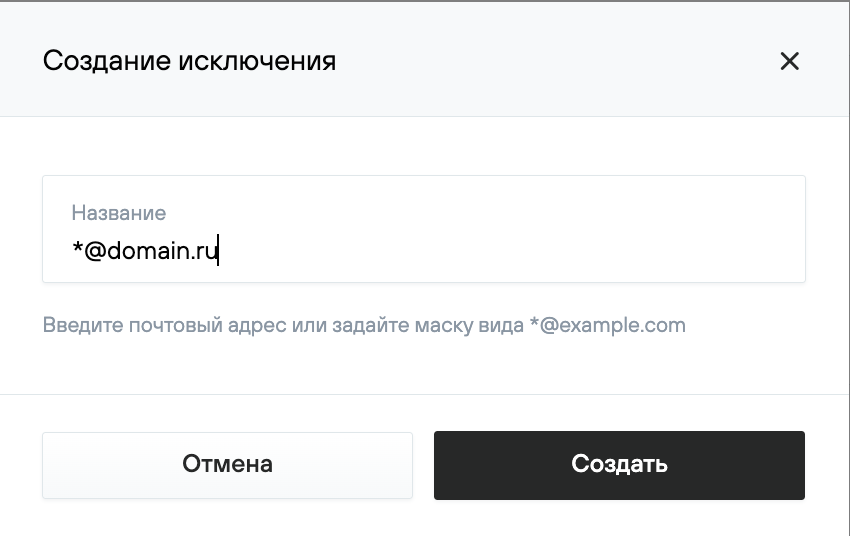
If the sender’s address or domain is added to the whitelist, its messages will not be checked by the spam filter.
You can add an address to the whitelist in the hosting control panel under Mail (Почта) → your_domain → Spam filter (Спам-фильтр). In the Whitelist (Белый список) section, click Create exception (Создать исключение) and, in the new window, enter the email address or specify a mask in the format *@example.com.
Deleting Emails from a Mailbox
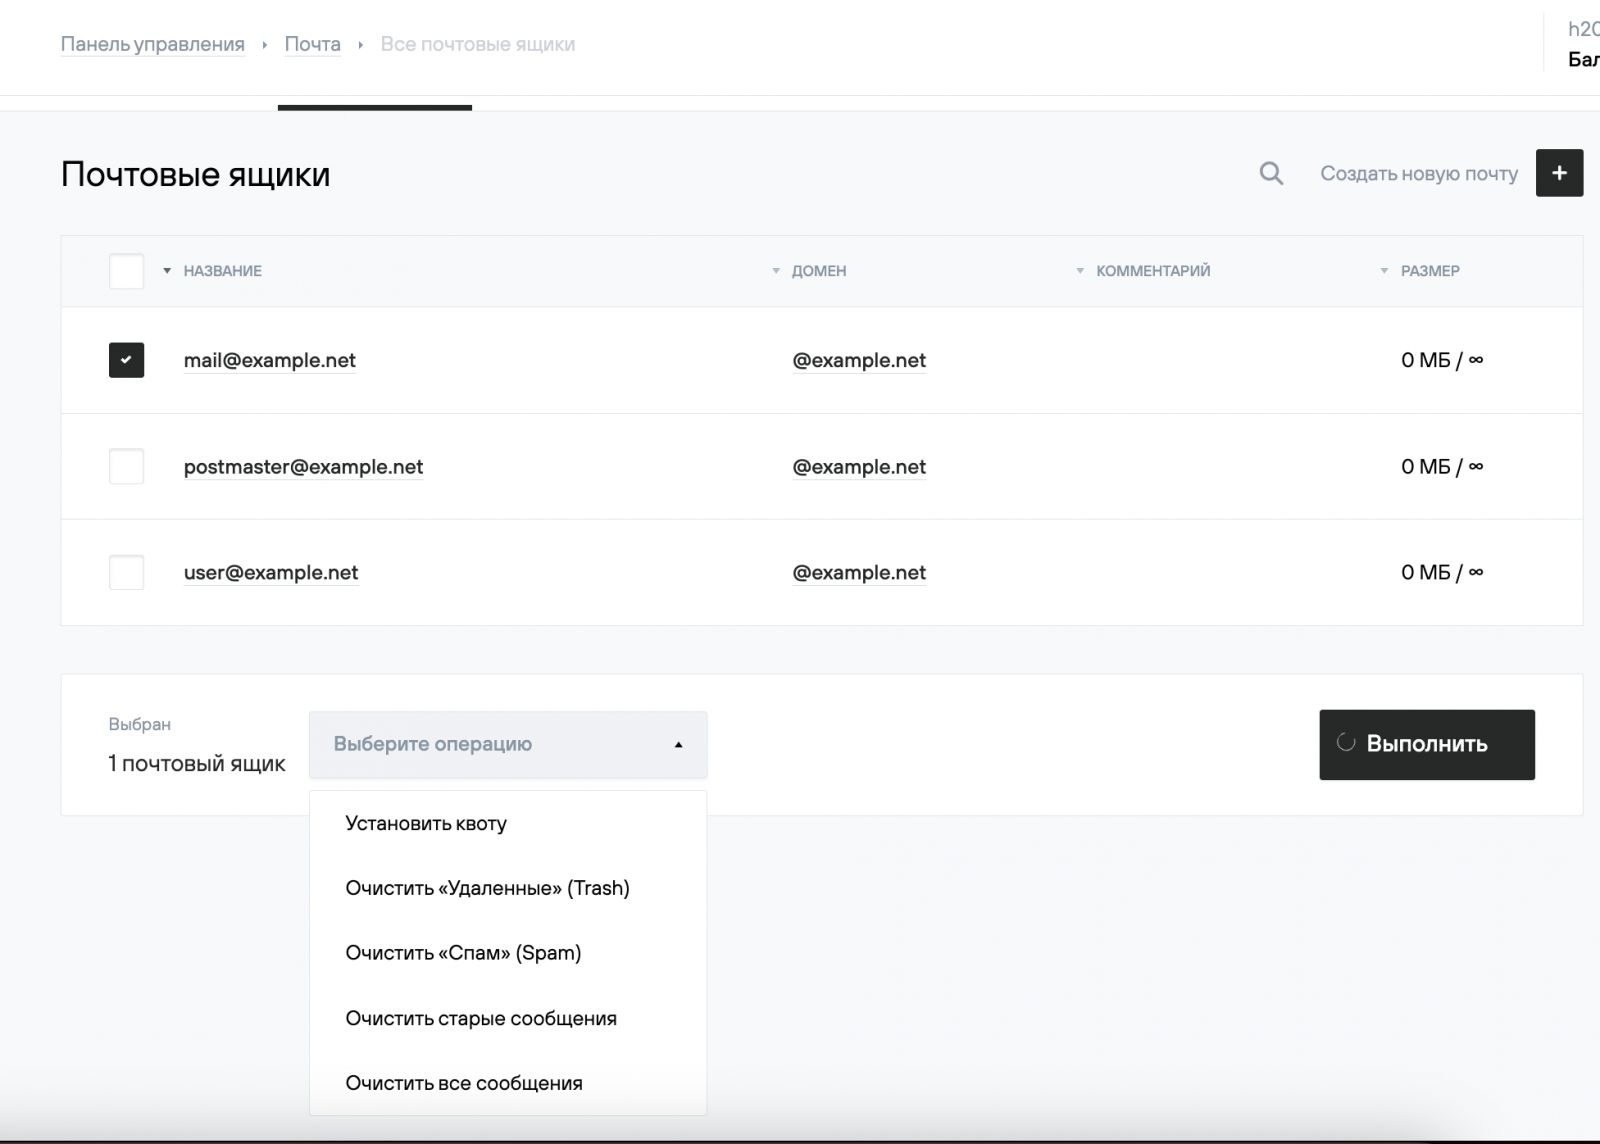
The mail server administrator can perform bulk deletion of messages from mailboxes. To do this, in the hosting control panel go to Mail (Почта) → your_domain, select the required mailboxes, and then choose one of the following options:
- Delete all messages in the Deleted (Удаленные) folders;
- Delete all messages in the Spam (Спам) folders;
- Delete all messages older than N days;
- Delete all messages in all folders.