Site configuration — encoding, redirection, logs, and more
- Description of the «Sites» section in the control panel
- Changing site encoding
- Enabling data compression
- Enabling data caching
- Redirection setup
- Manual web server and site configuration
- Error page management
- Logging configuration
- Moving the website to a new domain
- Service domain for testing
- Unpublishing or disabling the website
1. Description of the «Sites» section in the control panel
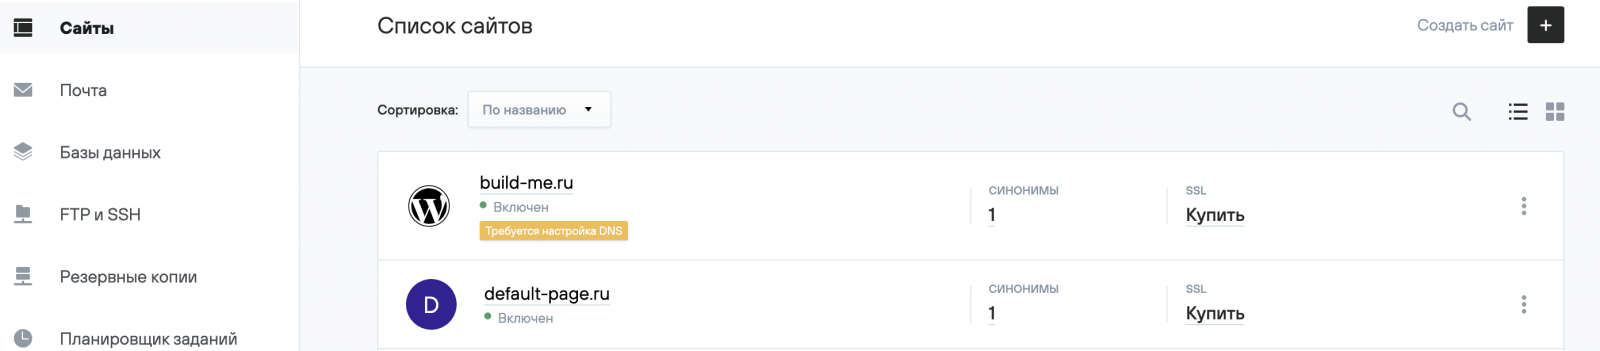
Website creation and management on the hosting is done in the Sites (Сайты) section of the hosting control panel. In this section you can:
- add a new site by clicking the Create Site (Создать сайт) button;
- manage an existing site by clicking its name;
- go to the site aliases management by clicking the appropriate field.
Clicking on the site name takes you to a page with the main information.

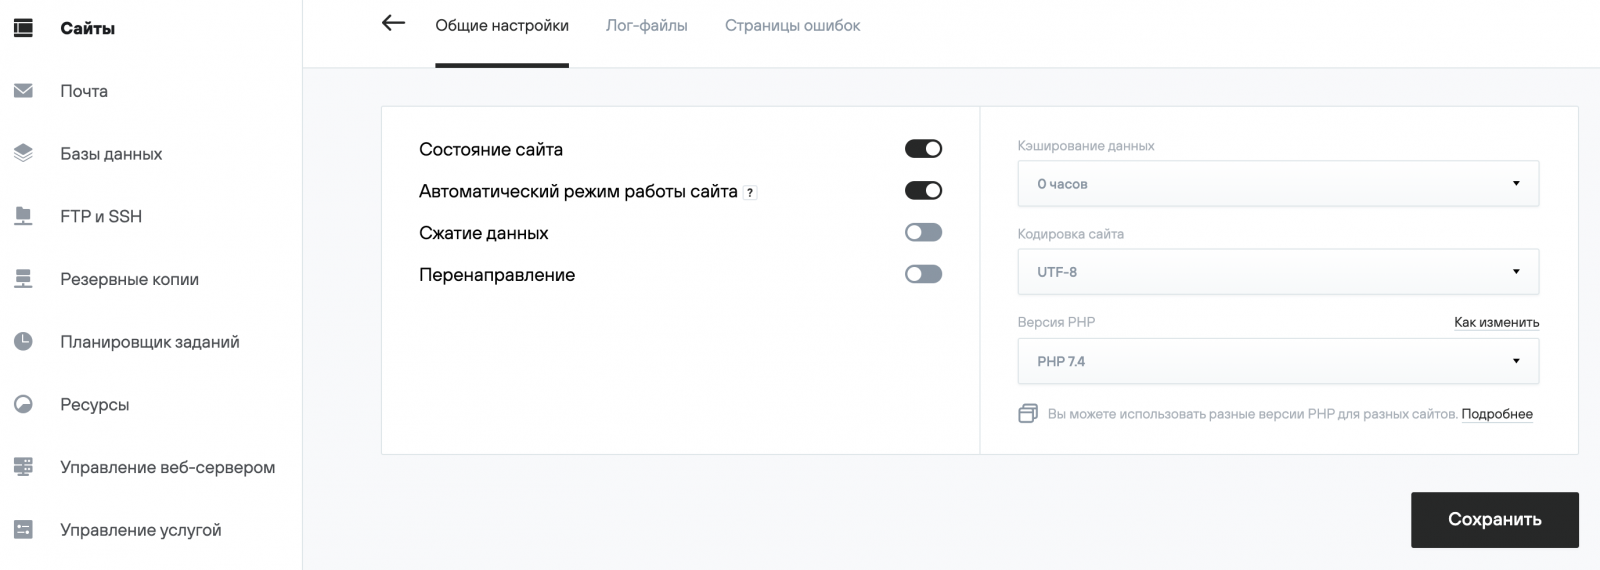
On the Settings (Настройки) page, you can change the basic site settings.
In the CMS section, you can install a CMS on your site automatically.

In the Web Server (Веб-сервер) section, you can configure the main website parameters.
In the Task Scheduler (Планировщик заданий) section, you can configure scheduled tasks — more details in the article.
In the Aliases (Синонимы) section, you can add additional website aliases — more details in the article.
2. Changing site encoding
By default, the hosting uses utf-8 encoding.
To change the encoding, go to Sites (Сайты) — Your_domain — Settings (Настройки) — Web Server (Веб-сервер) in the control panel, change the Site Encoding (Кодировка сайта) parameter and save the changes. For the site to work correctly, make sure that the site scripts explicitly specify the encoding when working with the hosting's database server (e.g., using the PHP function mysql_set_charset). Popular CMS do this by default and usually don’t require additional configuration.
3. Enabling data compression
Allows server-side compression (using gzip) and decompression on the client side (in the browser). This reduces network traffic and shortens page load time.
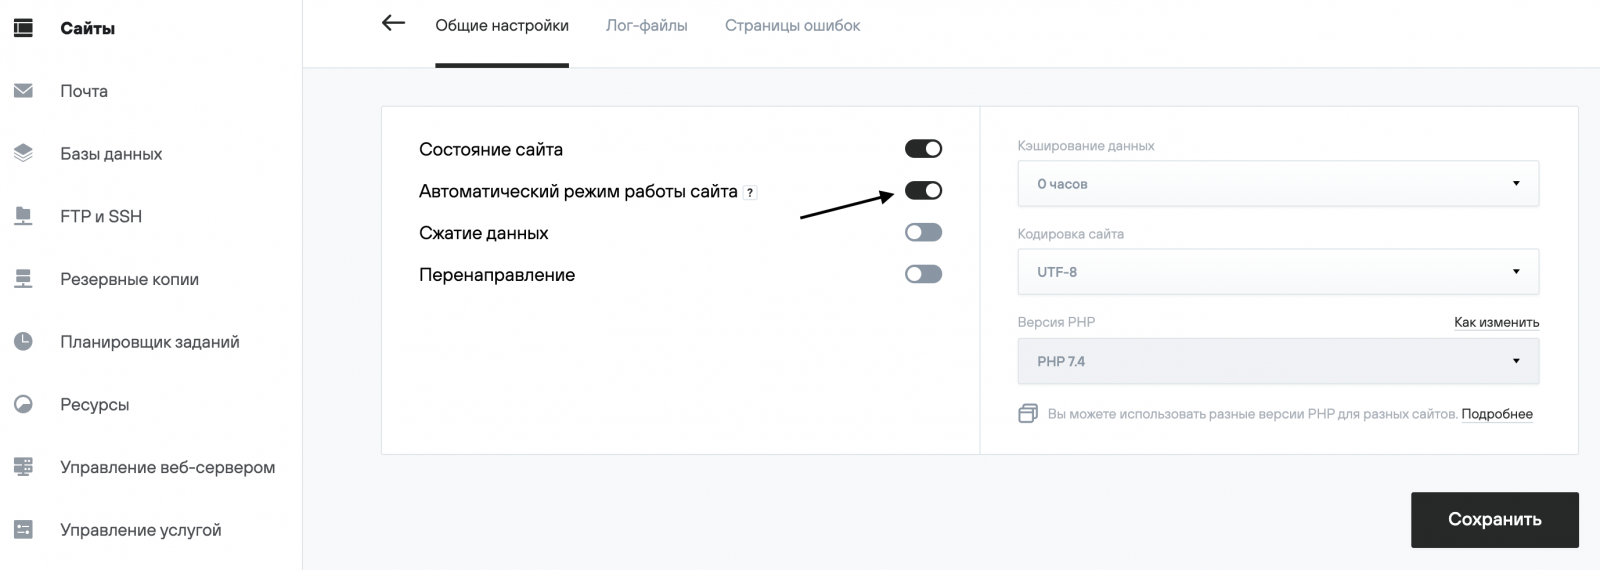
To enable compression, go to Sites (Сайты) — Your_domain — Settings (Настройки) — Web Server (Веб-сервер) in the control panel and activate the Data Compression (Сжатие данных) slider.
4. Enabling data caching
Allows you to specify how long static files are stored in the visitor’s browser cache. This significantly reduces page load time and network traffic. The value is set in hours. A value of zero disables browser cache duration control for static files.
To enable caching, go to Sites (Сайты) — Your_domain — Settings (Настройки) — Web Server (Веб-сервер) in the control panel, change the Data Caching (Кэширование данных) parameter to the desired number of hours, and save the changes.
5. Redirection setup
The control panel allows you to set up redirection of requests from the site and all its aliases to another address. For example, to set up redirection from example.com to example.ru, do the following:
In Sites (Сайты) — Your_domain — Settings (Настройки) — Web Server (Веб-сервер) in the control panel, activate the Redirection (Перенаправление) slider;
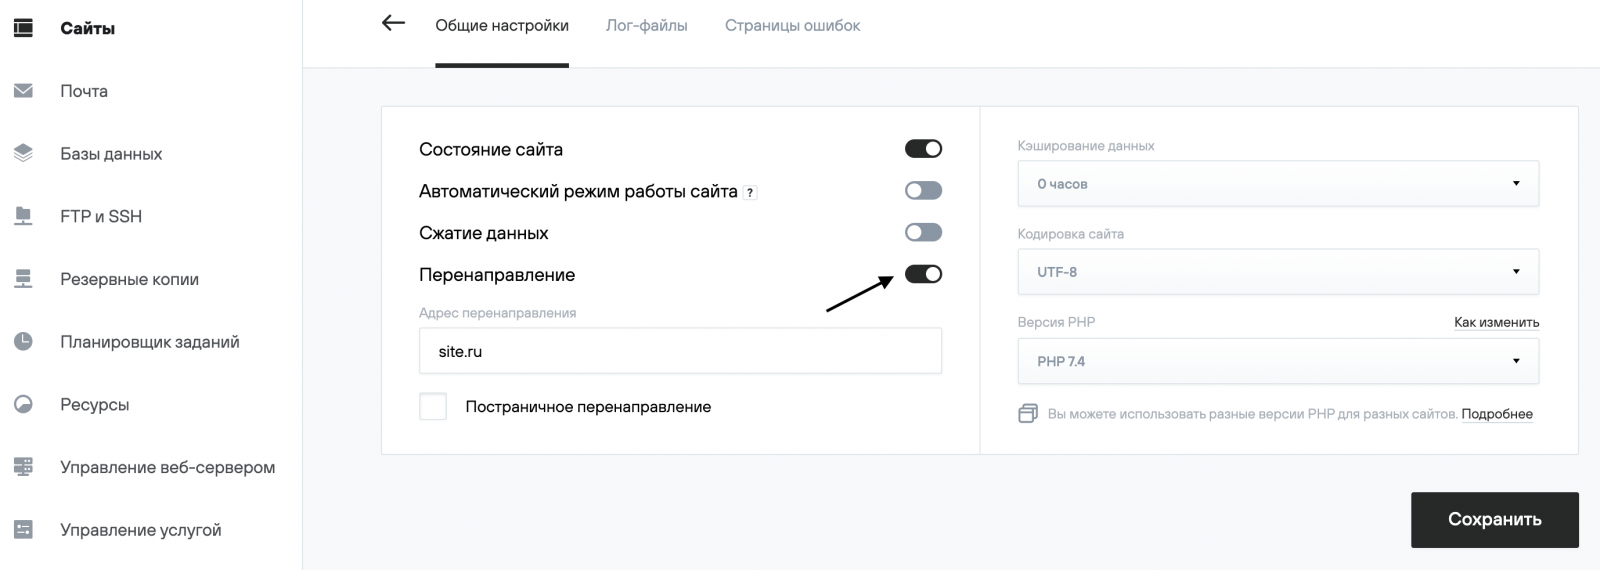
In the field that appears, enter the address to which you want to redirect requests and click Save (Сохранить). If you enable per-page redirection, page requests will be redirected to the new domain: http://site.com/test.php → http://site.ru/test.php.
You can also configure other types of redirection using the .htaccess file.
6. Manual web server and site configuration
The control panel allows you to change the main set of parameters for the site and virtual server. If you need to modify configuration files, you can switch the virtual server and sites to manual configuration mode.
You can change the site configuration mode in the control panel at Sites (Сайты) — Your_domain — Settings (Настройки) — Web Server (Веб-сервер).
This enables editing of the configuration files. To edit them, you must use SSH access.
/home/login/etc/httpd/php*/site.ru.conf — Apache virtual host configuration file;

/home/login/etc/nginx/site.ru.conf — Nginx virtual host configuration file.
or
/home/login/etc/apache_2.4/sites-enabled/site.ru.site.conf — Apache virtual host configuration file;

/home/login/etc/nginx/sites-enabled/site.ru.site.conf — Nginx virtual host configuration file.
To apply the changes, you must restart the web server from the corresponding page in the hosting control panel.

You can change the web server configuration mode in the Web Server Management (Управление веб-сервером) section of the hosting control panel.
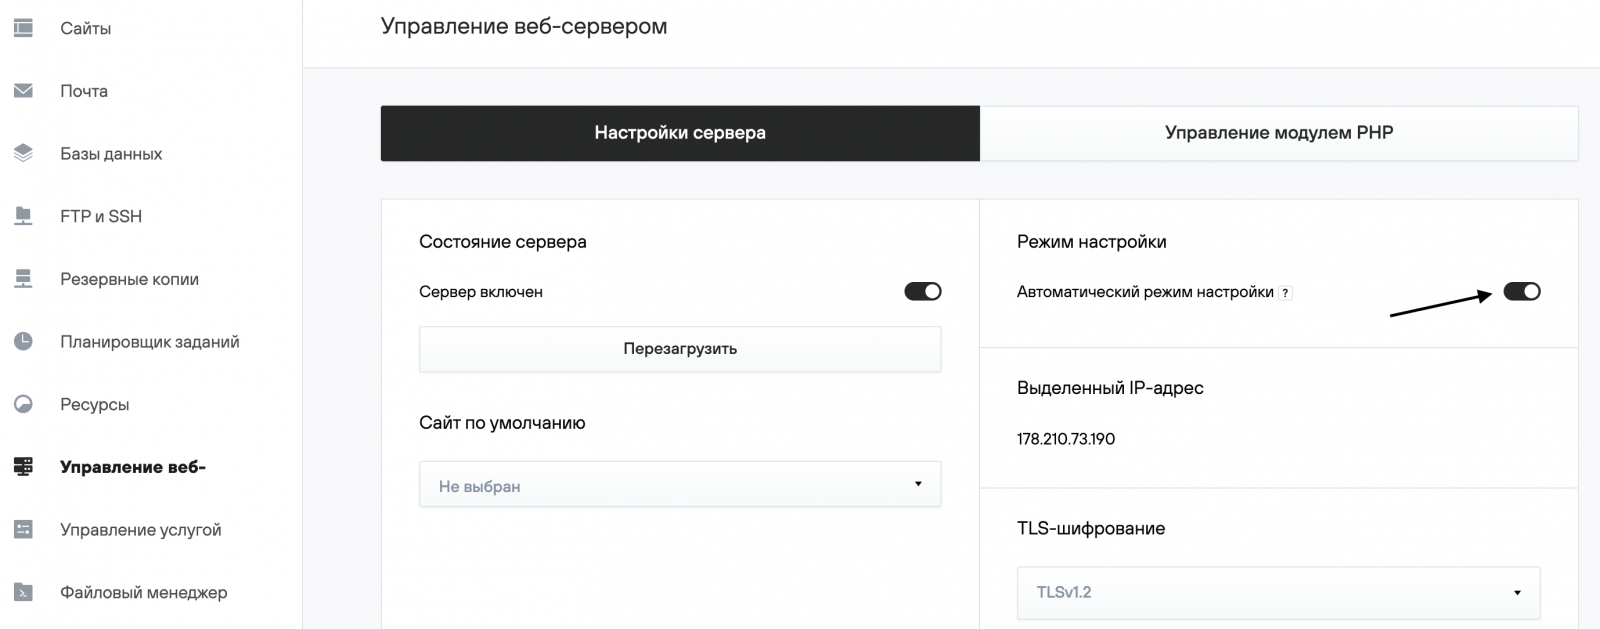
When manual configuration mode is enabled, the configuration files become available for editing. To edit them, you must use SSH access.
/home/login/etc/httpd/php*/httpd.conf — main configuration file for the Apache web server;/home/login/etc/nginx/nginx.conf — main configuration file for the Nginx web server.
or
/home/login/etc/apache_2.4/apache2.conf — main configuration file for the Apache web server;
/home/login/etc/nginx/nginx.conf — main configuration file for the Nginx web server.
To apply the changes, you must restart the web server from the corresponding page in the hosting control panel.
7. Error page management
You can manage error pages in the control panel at Sites (Сайты) — Your_domain — Settings (Настройки) — Web Server (Веб-сервер) — Error Pages (Страницы ошибок). Default error pages are located on the hosting server in the folder your_domain/errordocs.
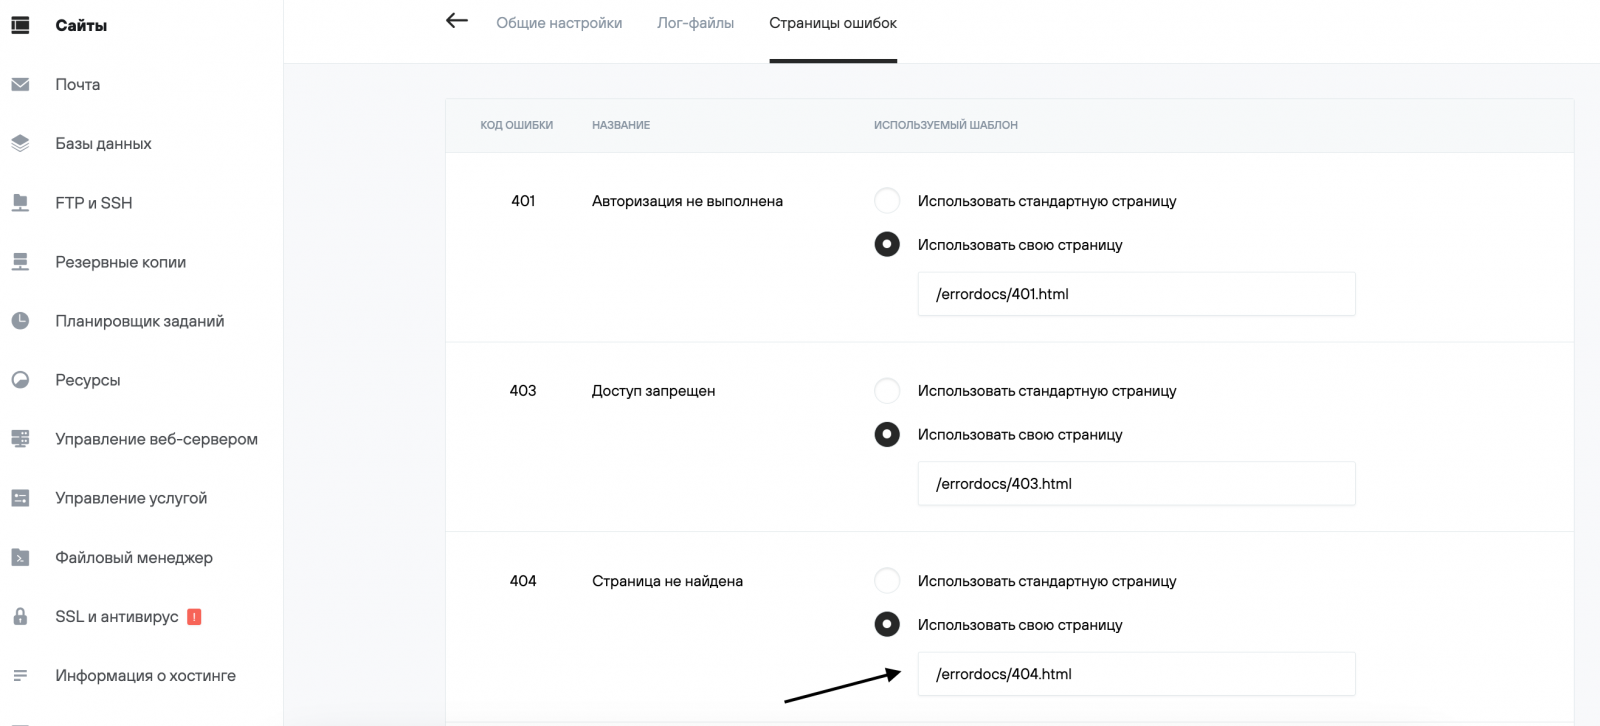
If you're using a custom error page, you need to specify its path relative to the site's root directory. In our example, the error page for 404 is the file 404.php located at /home/login/example.com/docs.
You can also configure error pages using the .htaccess file.
8. Logging configuration
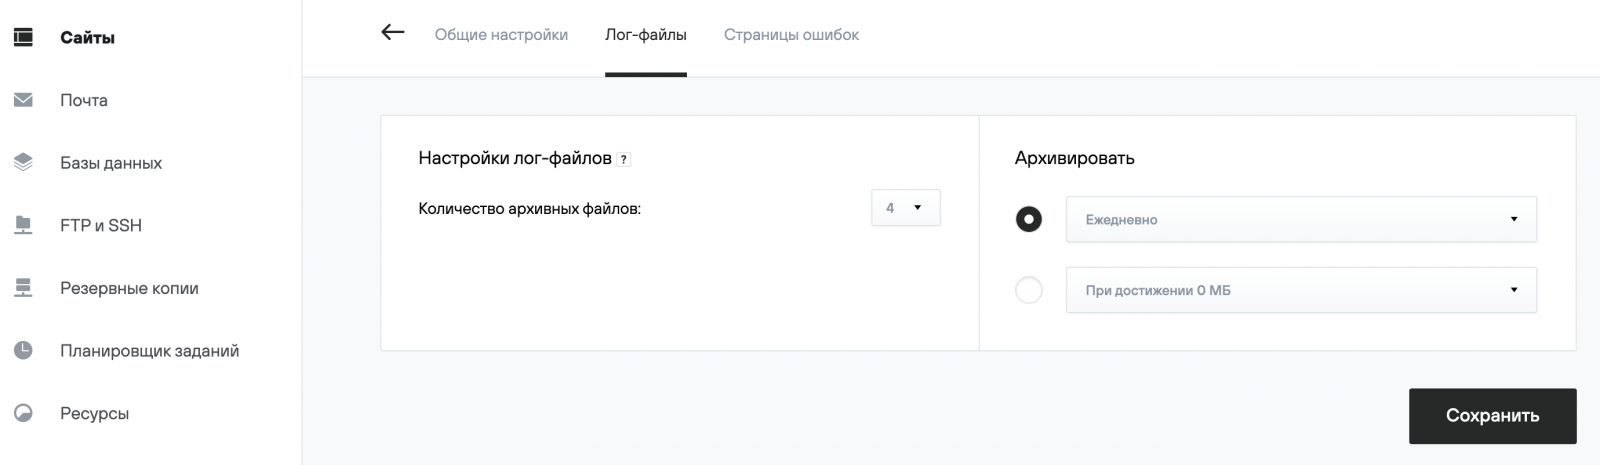
Logging settings are managed in the control panel at Sites (Сайты) — Your_domain — Settings (Настройки) — Web Server (Веб-сервер) — Log Files (Лог-файлы). Here you can set the frequency, number, and method of archiving log files on the hosting server.
9. Moving the website to a new domain
To transfer the site example.com to a new domain example.ru, do the following:
- In the Sites (Сайты) section, create a site with the new domain name example.ru.
- In the File Manager (Файловый менеджер), open the folder named after the old domain example.com, select and copy the docs folder containing the site's files.
- Go to the folder named after the new site example.ru, delete the existing docs folder, and click the Paste (Вставить) button. The site files will be copied. The step-by-step procedure is described in the File Manager article. If your hosting service does not have enough disk space to create a site copy, use the Cut (Вырезать) function to move files.
- Check the operation of the site on the new domain. For some CMS platforms, you may need to update filesystem paths in the site's config files and change settings related to the site name in the site admin panel.
- After verification, you can enable redirection from the old site to the new one or delete the old site example.com and its files from the hosting server.
10. Service (technical) domain for testing
If your domain has not yet been connected to hosting, you can check your website using the service (technical) domain login.nichost.ru (where «login» is your hosting service identifier).
When you order hosting with a domain, the service domain login.nichost.ru is automatically added as an alias to your website.
To use the service domain for another website on your hosting, you can remove the login.nichost.ru alias from the first site and add it as an alias to the new one. Changes will take effect within 15–30 minutes.
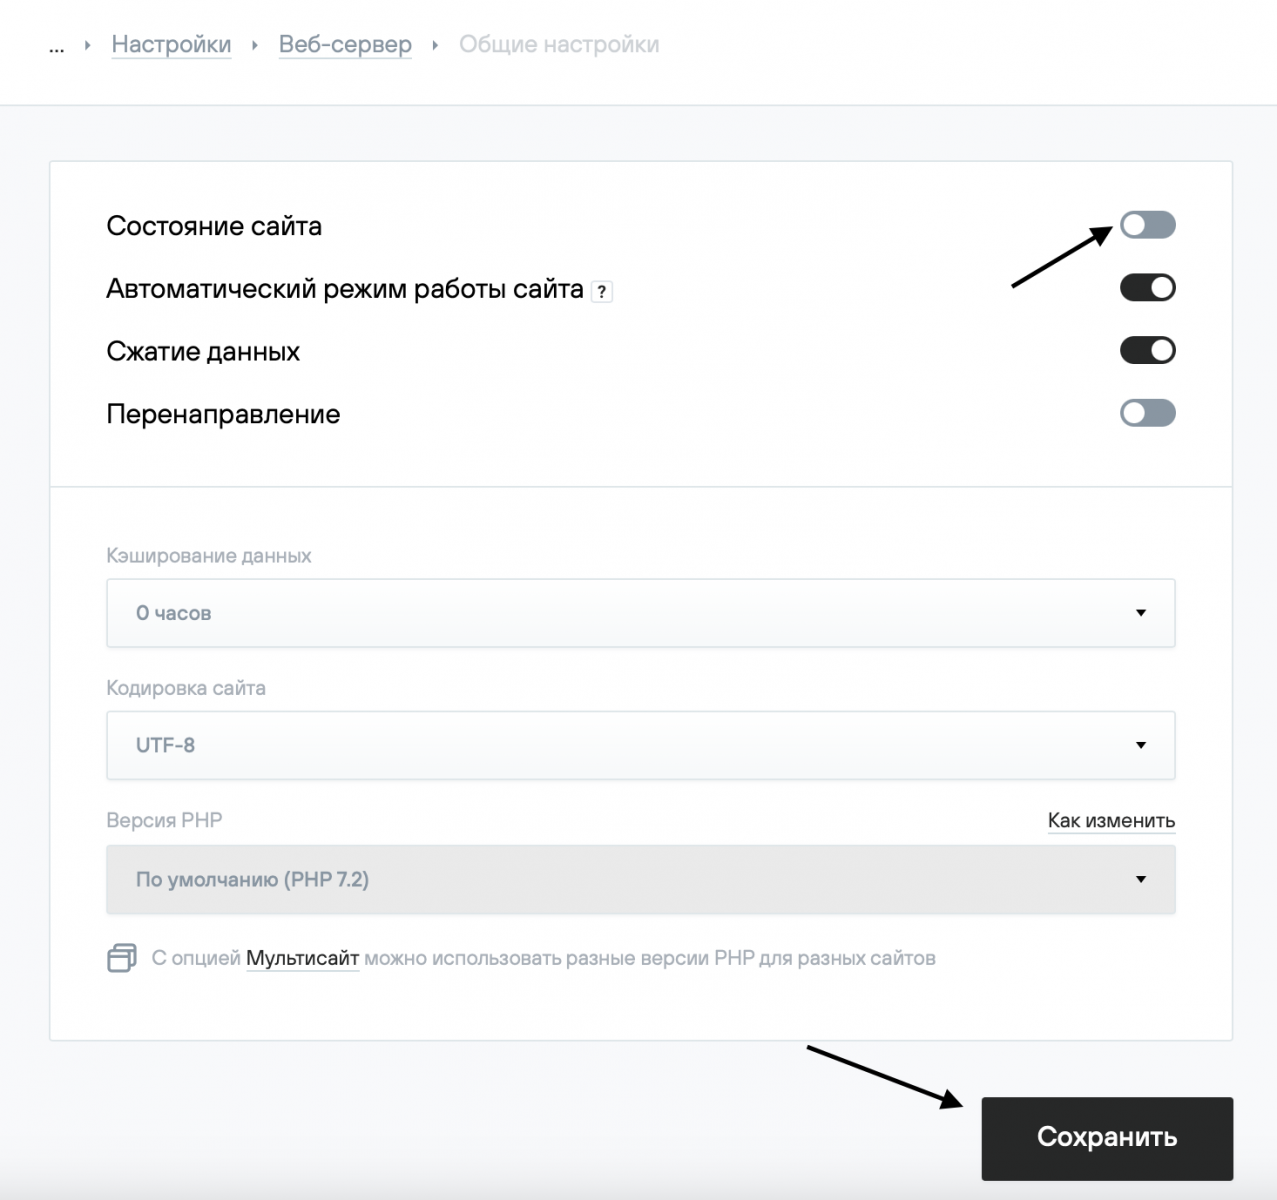
11. Unpublishing or disabling the website
Website status management is done in the «Sites (Сайты)» section of the hosting control panel. In this section, you can unpublish a website.
To disable a website, go to Sites (Сайты) — Your_domain — Settings (Настройки) — Web Server (Веб-сервер) in the hosting control panel, set the «Site status (Состояние сайта)» parameter to Off, and save the changes.