
Role Assignment
Roles under which different users can log in and work in the Control Panel can only be created (assigned) by the Main Administrator or Deputies.
Role assignment is performed in: Security — Multi-access — All Roles — Available Roles.
By default, this section displays a list of predefined roles — ready-made templates with preset configurations, which can be edited during creation (e.g., renaming the role or adjusting permissions).
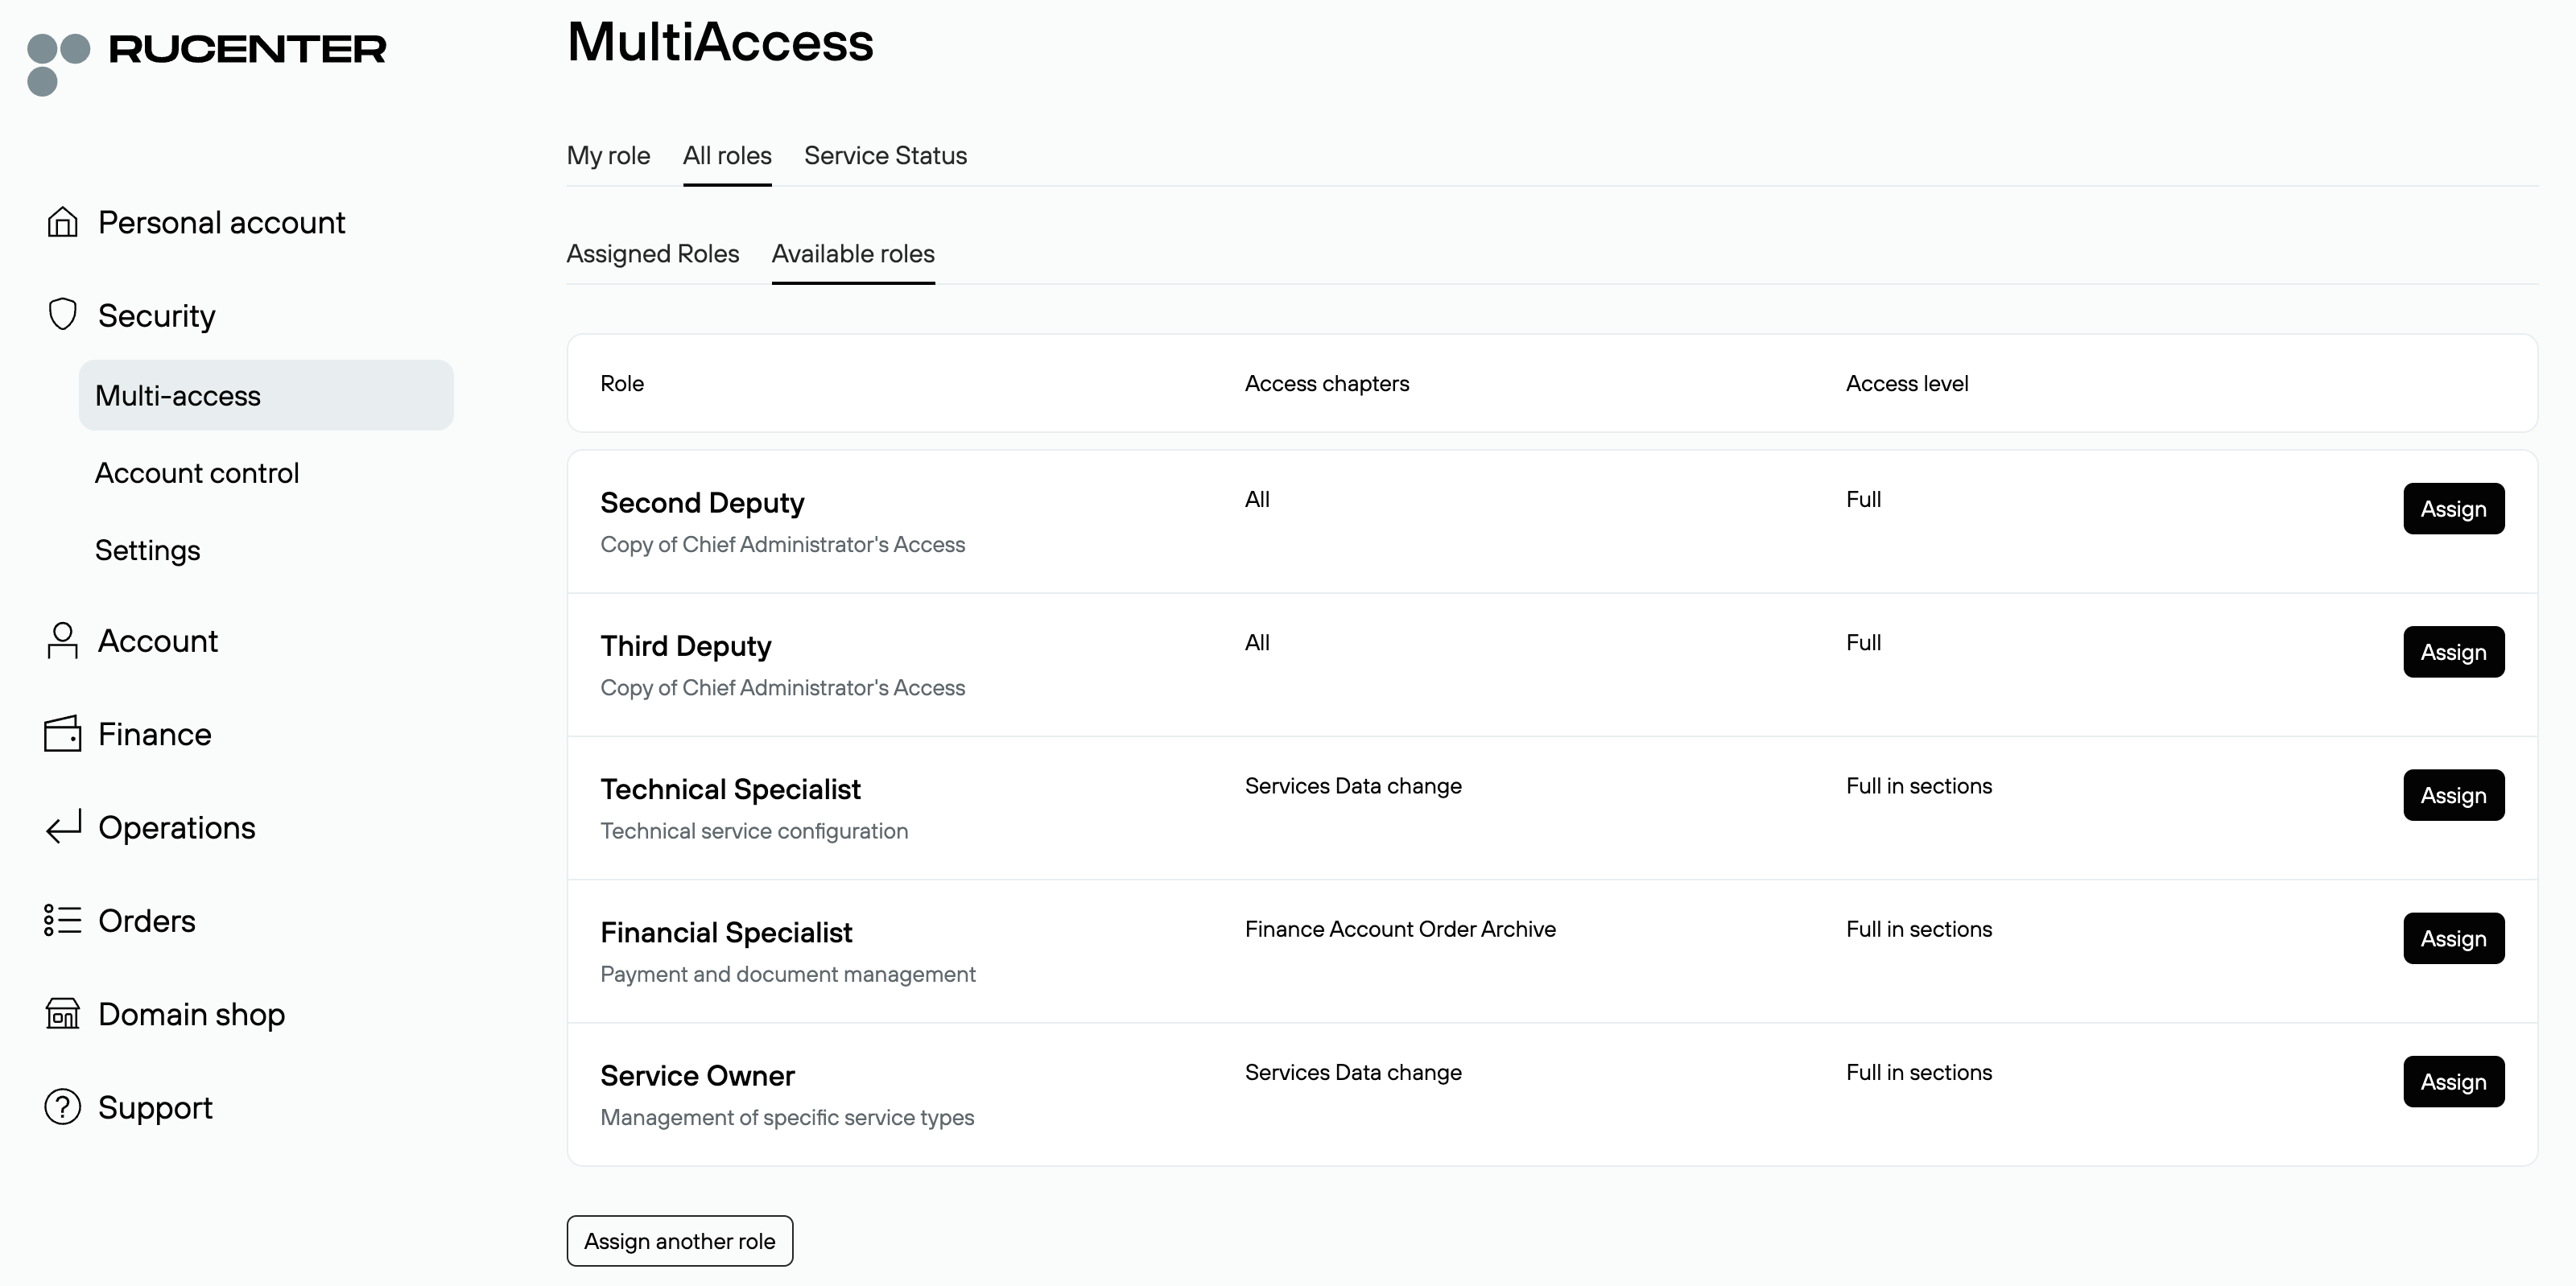
To create and configure a role: Click the “Assign” button in the row of the desired role. If you prefer not to use templates, click “Assign another role” to configure a role from scratch.
Steps for Creating/Assigning a Role
1. Role Data
Each role must include the following information: role name, full name of the user, job title, login (used for authorization in the control panel), email address, mobile phone number. Optionally, you may also specify a backup email address for notifications, but this field is not required.
At this stage, you must also set a password for the role to log into the Control Panel. This password must be saved and provided to the user who will log in under this role.
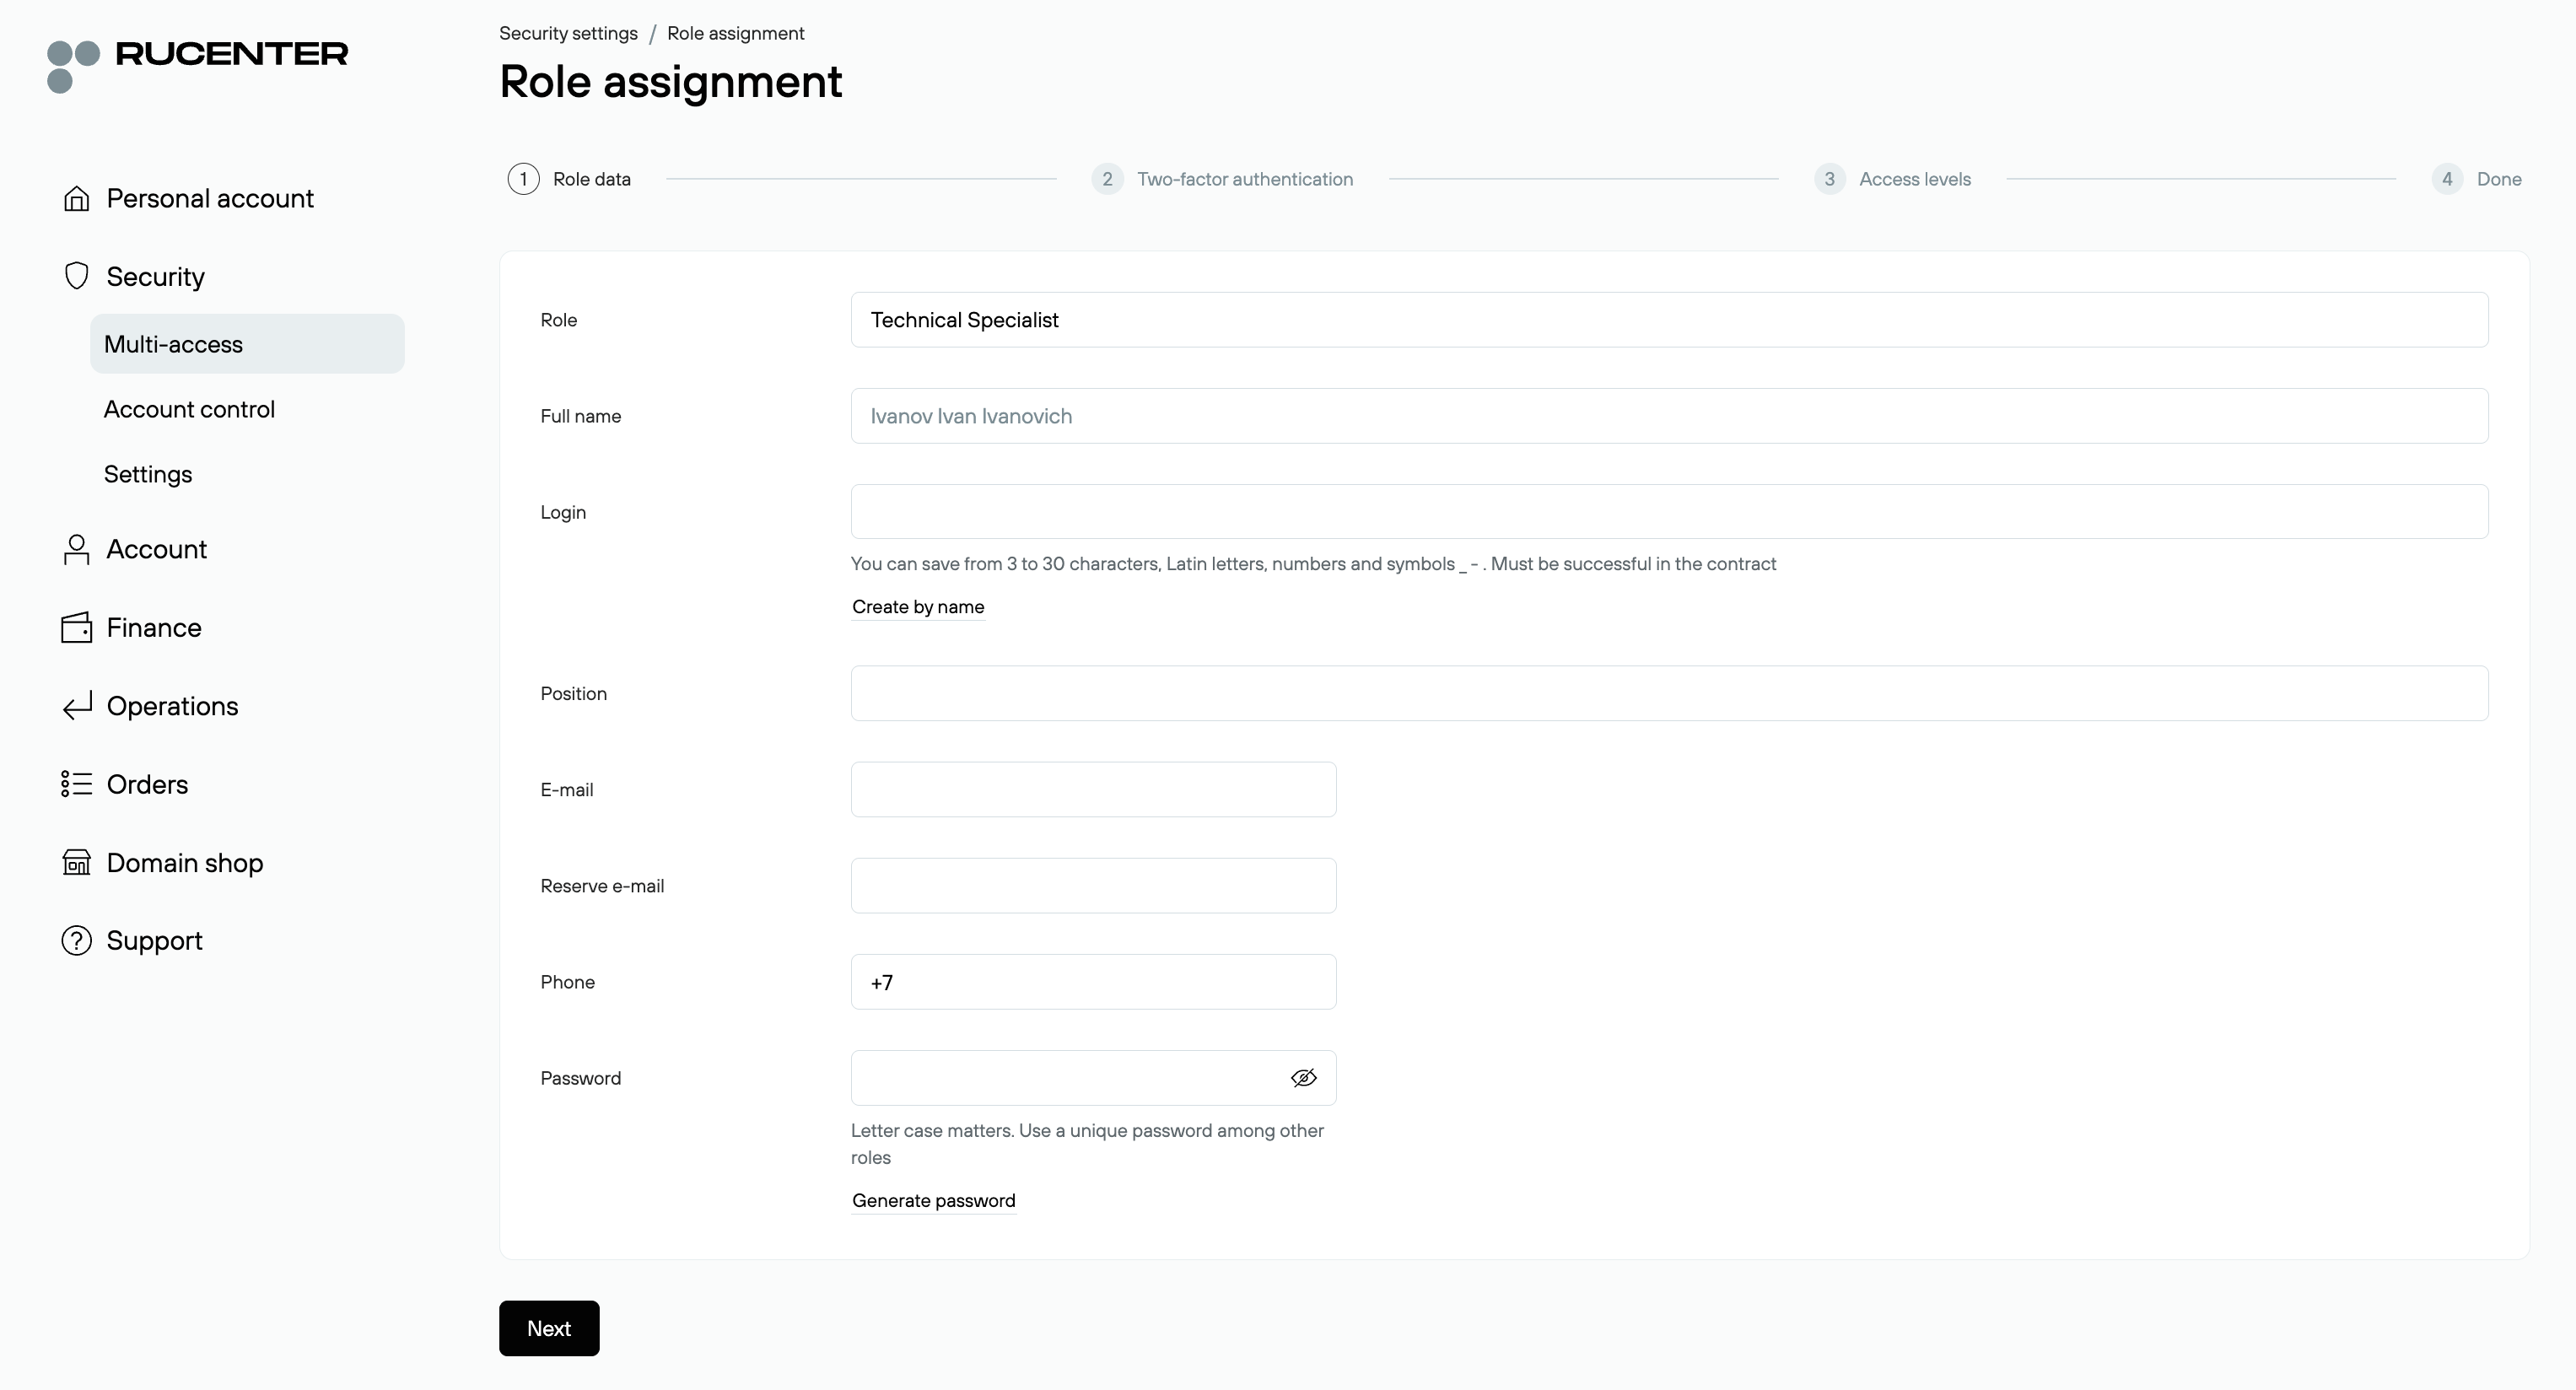
After completing all fields, click "Next".
2. Two-Factor Authentication
Two-factor authentication for roles is a mandatory requirement for working in Multi-access mode.
You can configure one or both authentication methods — the role owner will be able to use either method to log in:
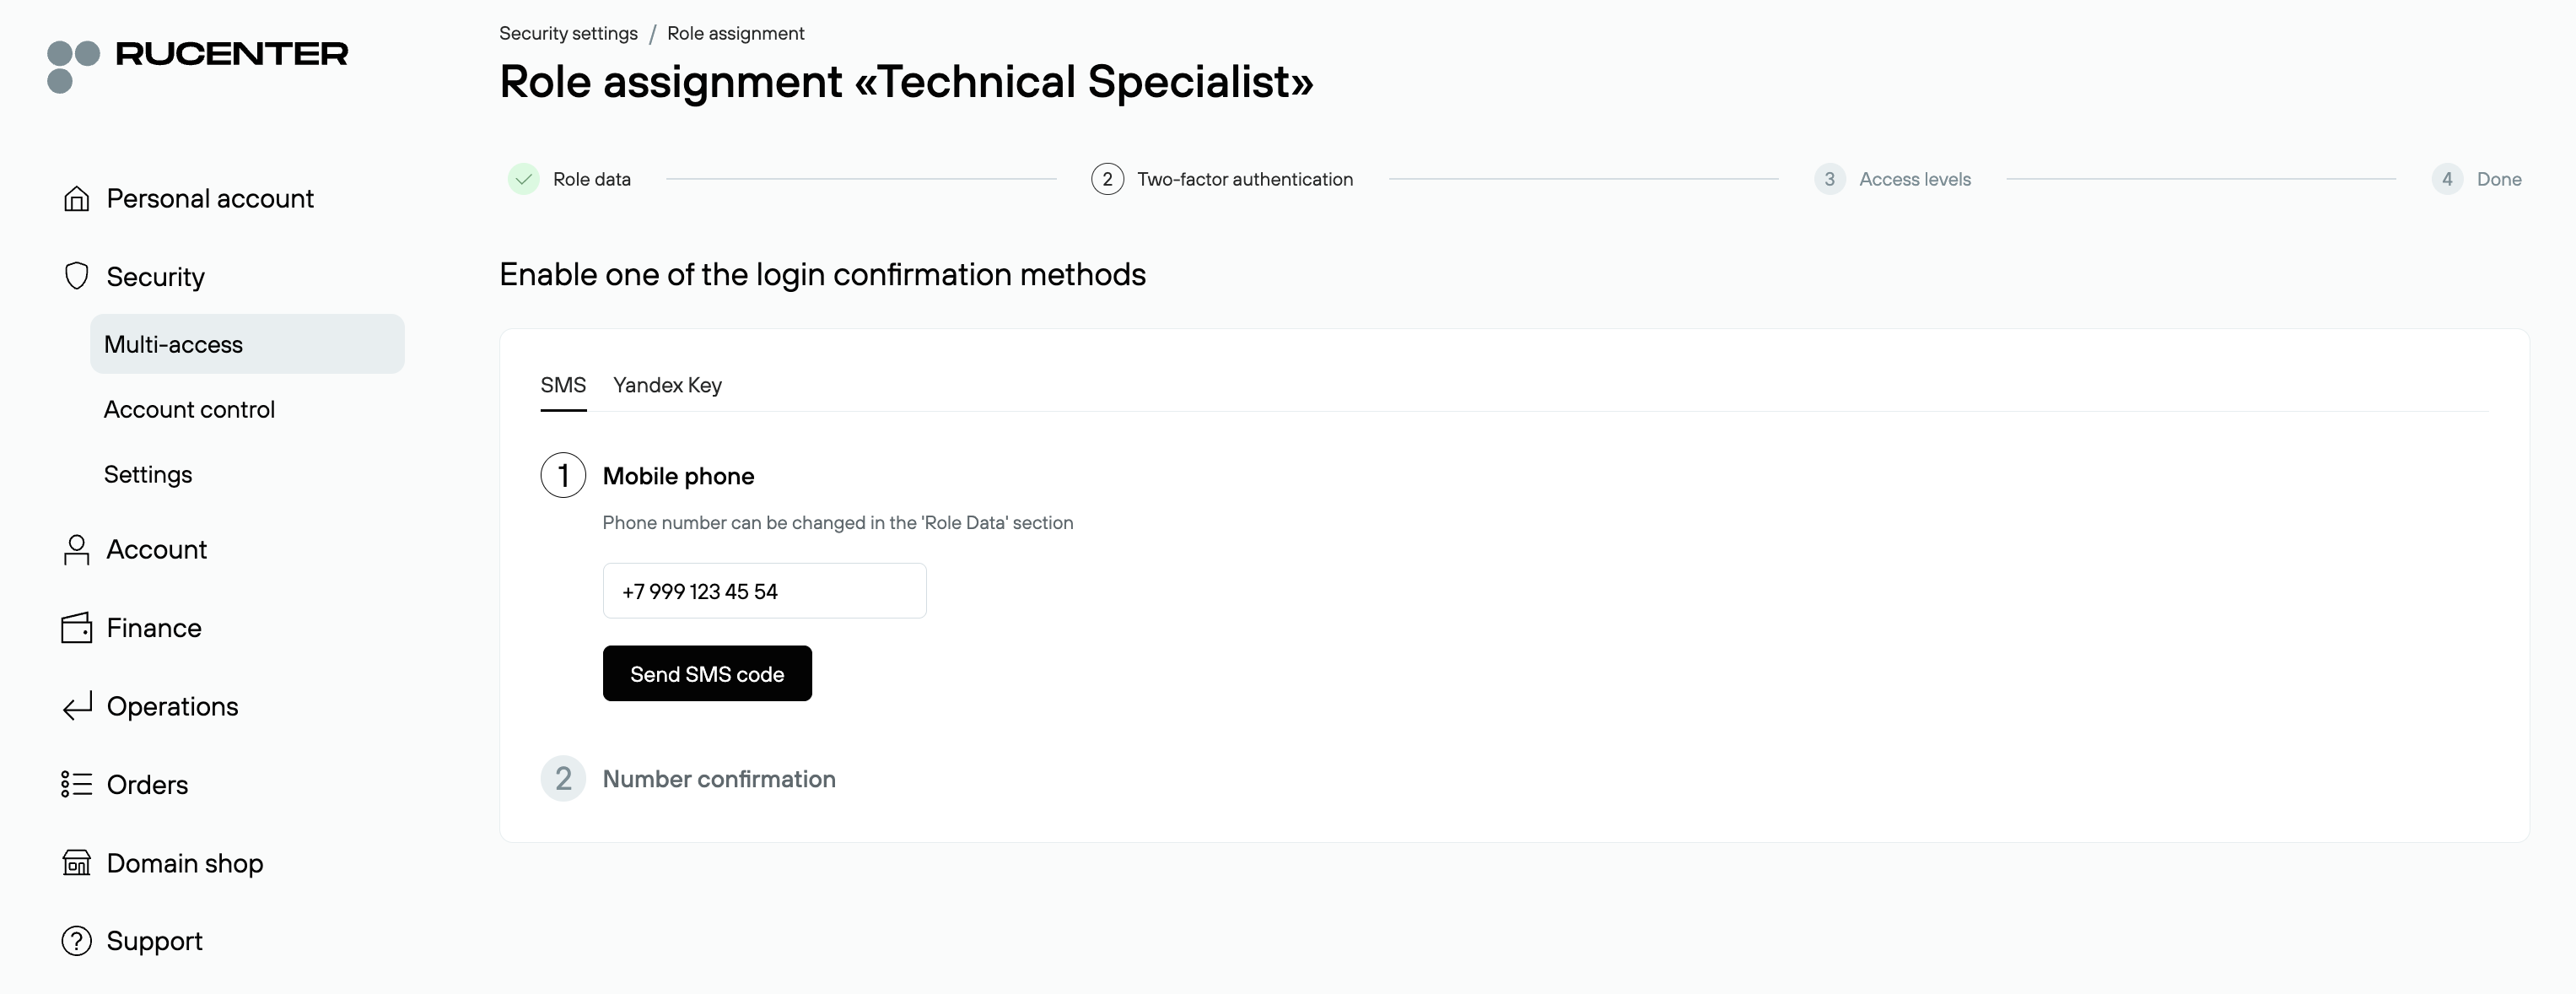
SMS Authentication will use the phone number specified in the role’s contact information. If the phone number needs to be changed in the future, this can be done by reconfiguring two-factor authentication. If a different number is entered during setup, it will automatically overwrite the role’s contact number.
Yandex.Key Authentication requires that the Yandex.Key application be installed on the role owner’s device.
Note: During role setup, the future role owner must be available to provide the SMS code or the code generated in the Yandex.Key app in order to complete two-factor authentication.
3. Access Levels
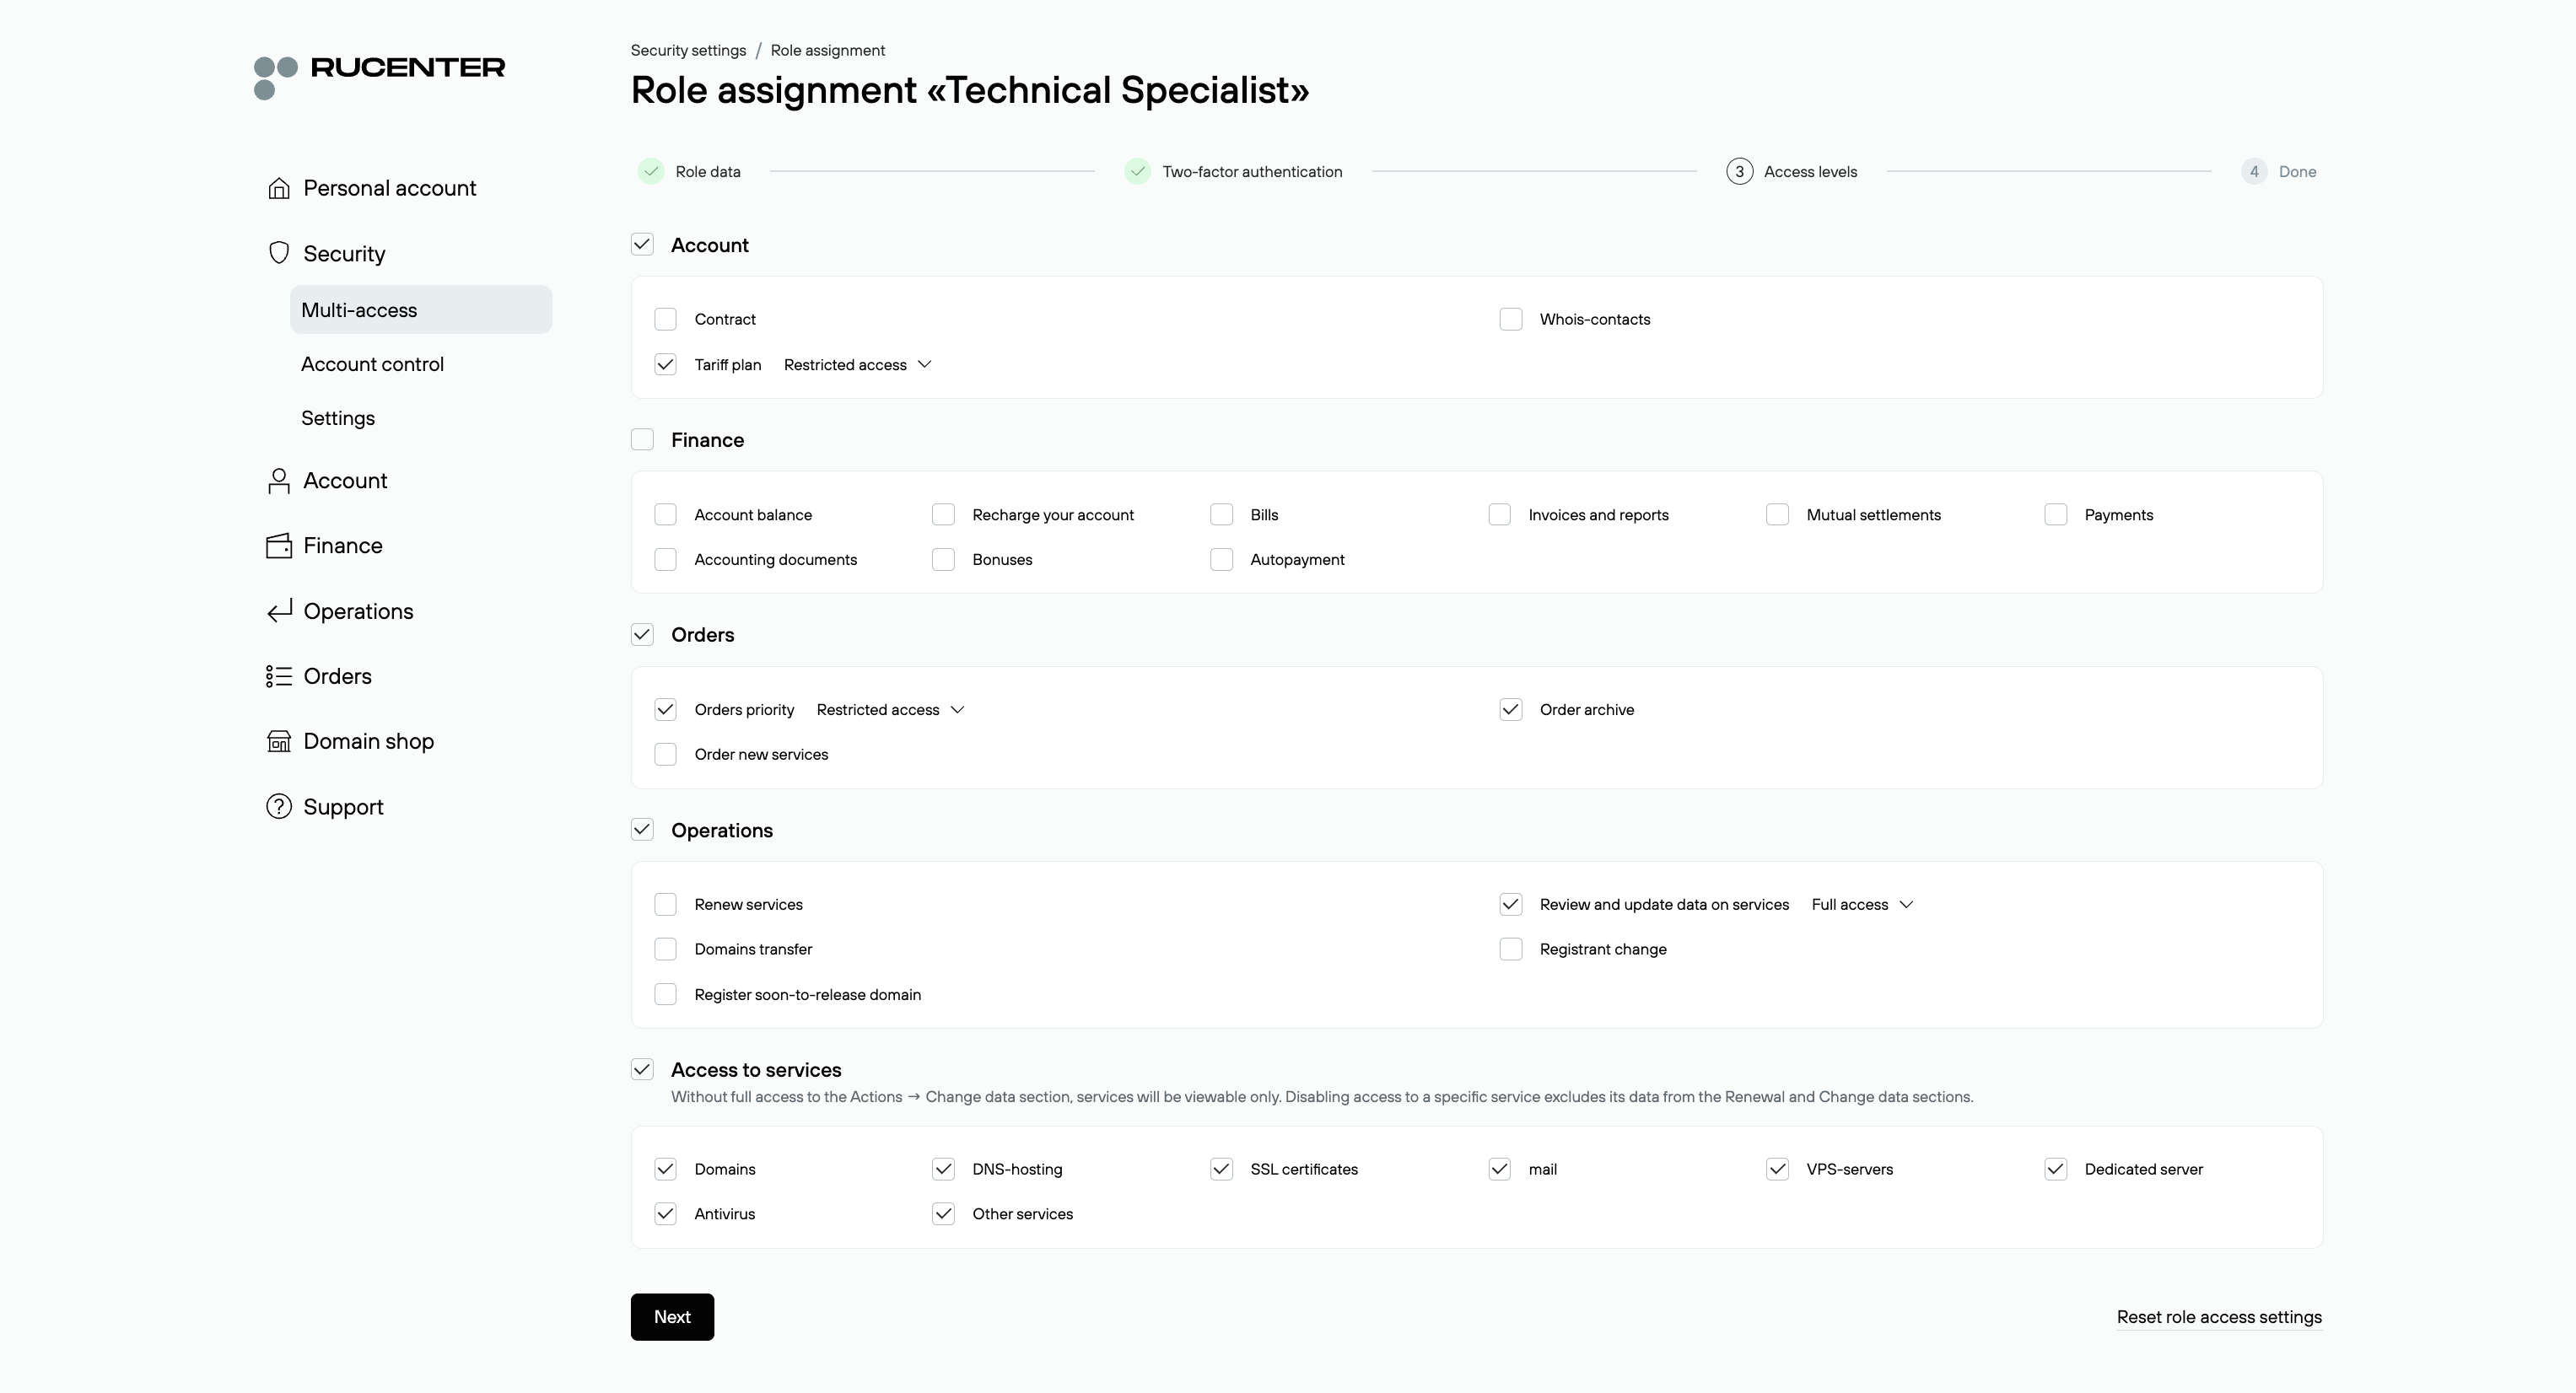
At the final step of role creation, you must select the sections of the Control Panel the role owner will be allowed to access.
For most sections, access can be granted fully or denied completely.
Checking the box next to a section name means granting full access to view and modify parameters in that section. Leaving it unchecked means no access to that section.
Some Control Panel sections allow partial or full restriction of access:
- Account — Agreement
- Account — Price Plan
- Account — Whois Contacts
- Orders — Processing queue
- Actions — Service Renewal
- Actions — Data Changes
Partial restriction means the role has view-only access to a section, without the ability to make changes. To provide this level of access: Check the box next to the desired section. In the dropdown list, select "Restricted Access / View Only".
Granting full access allows the user to make changes in the section, such as updating agreement details, changing the price plan, renewing services, modifying service data, etc.
Access to services by default provides view-only access to service data. Changes to services are only possible for roles that have full access to the "Data Changes” section.
Restrictions by role type: When creating a secondary role, you cannot grant full access to all sections. When creating a Deputy role, you cannot change or restrict the default rights.
After configuring access rights, the role setup is complete.
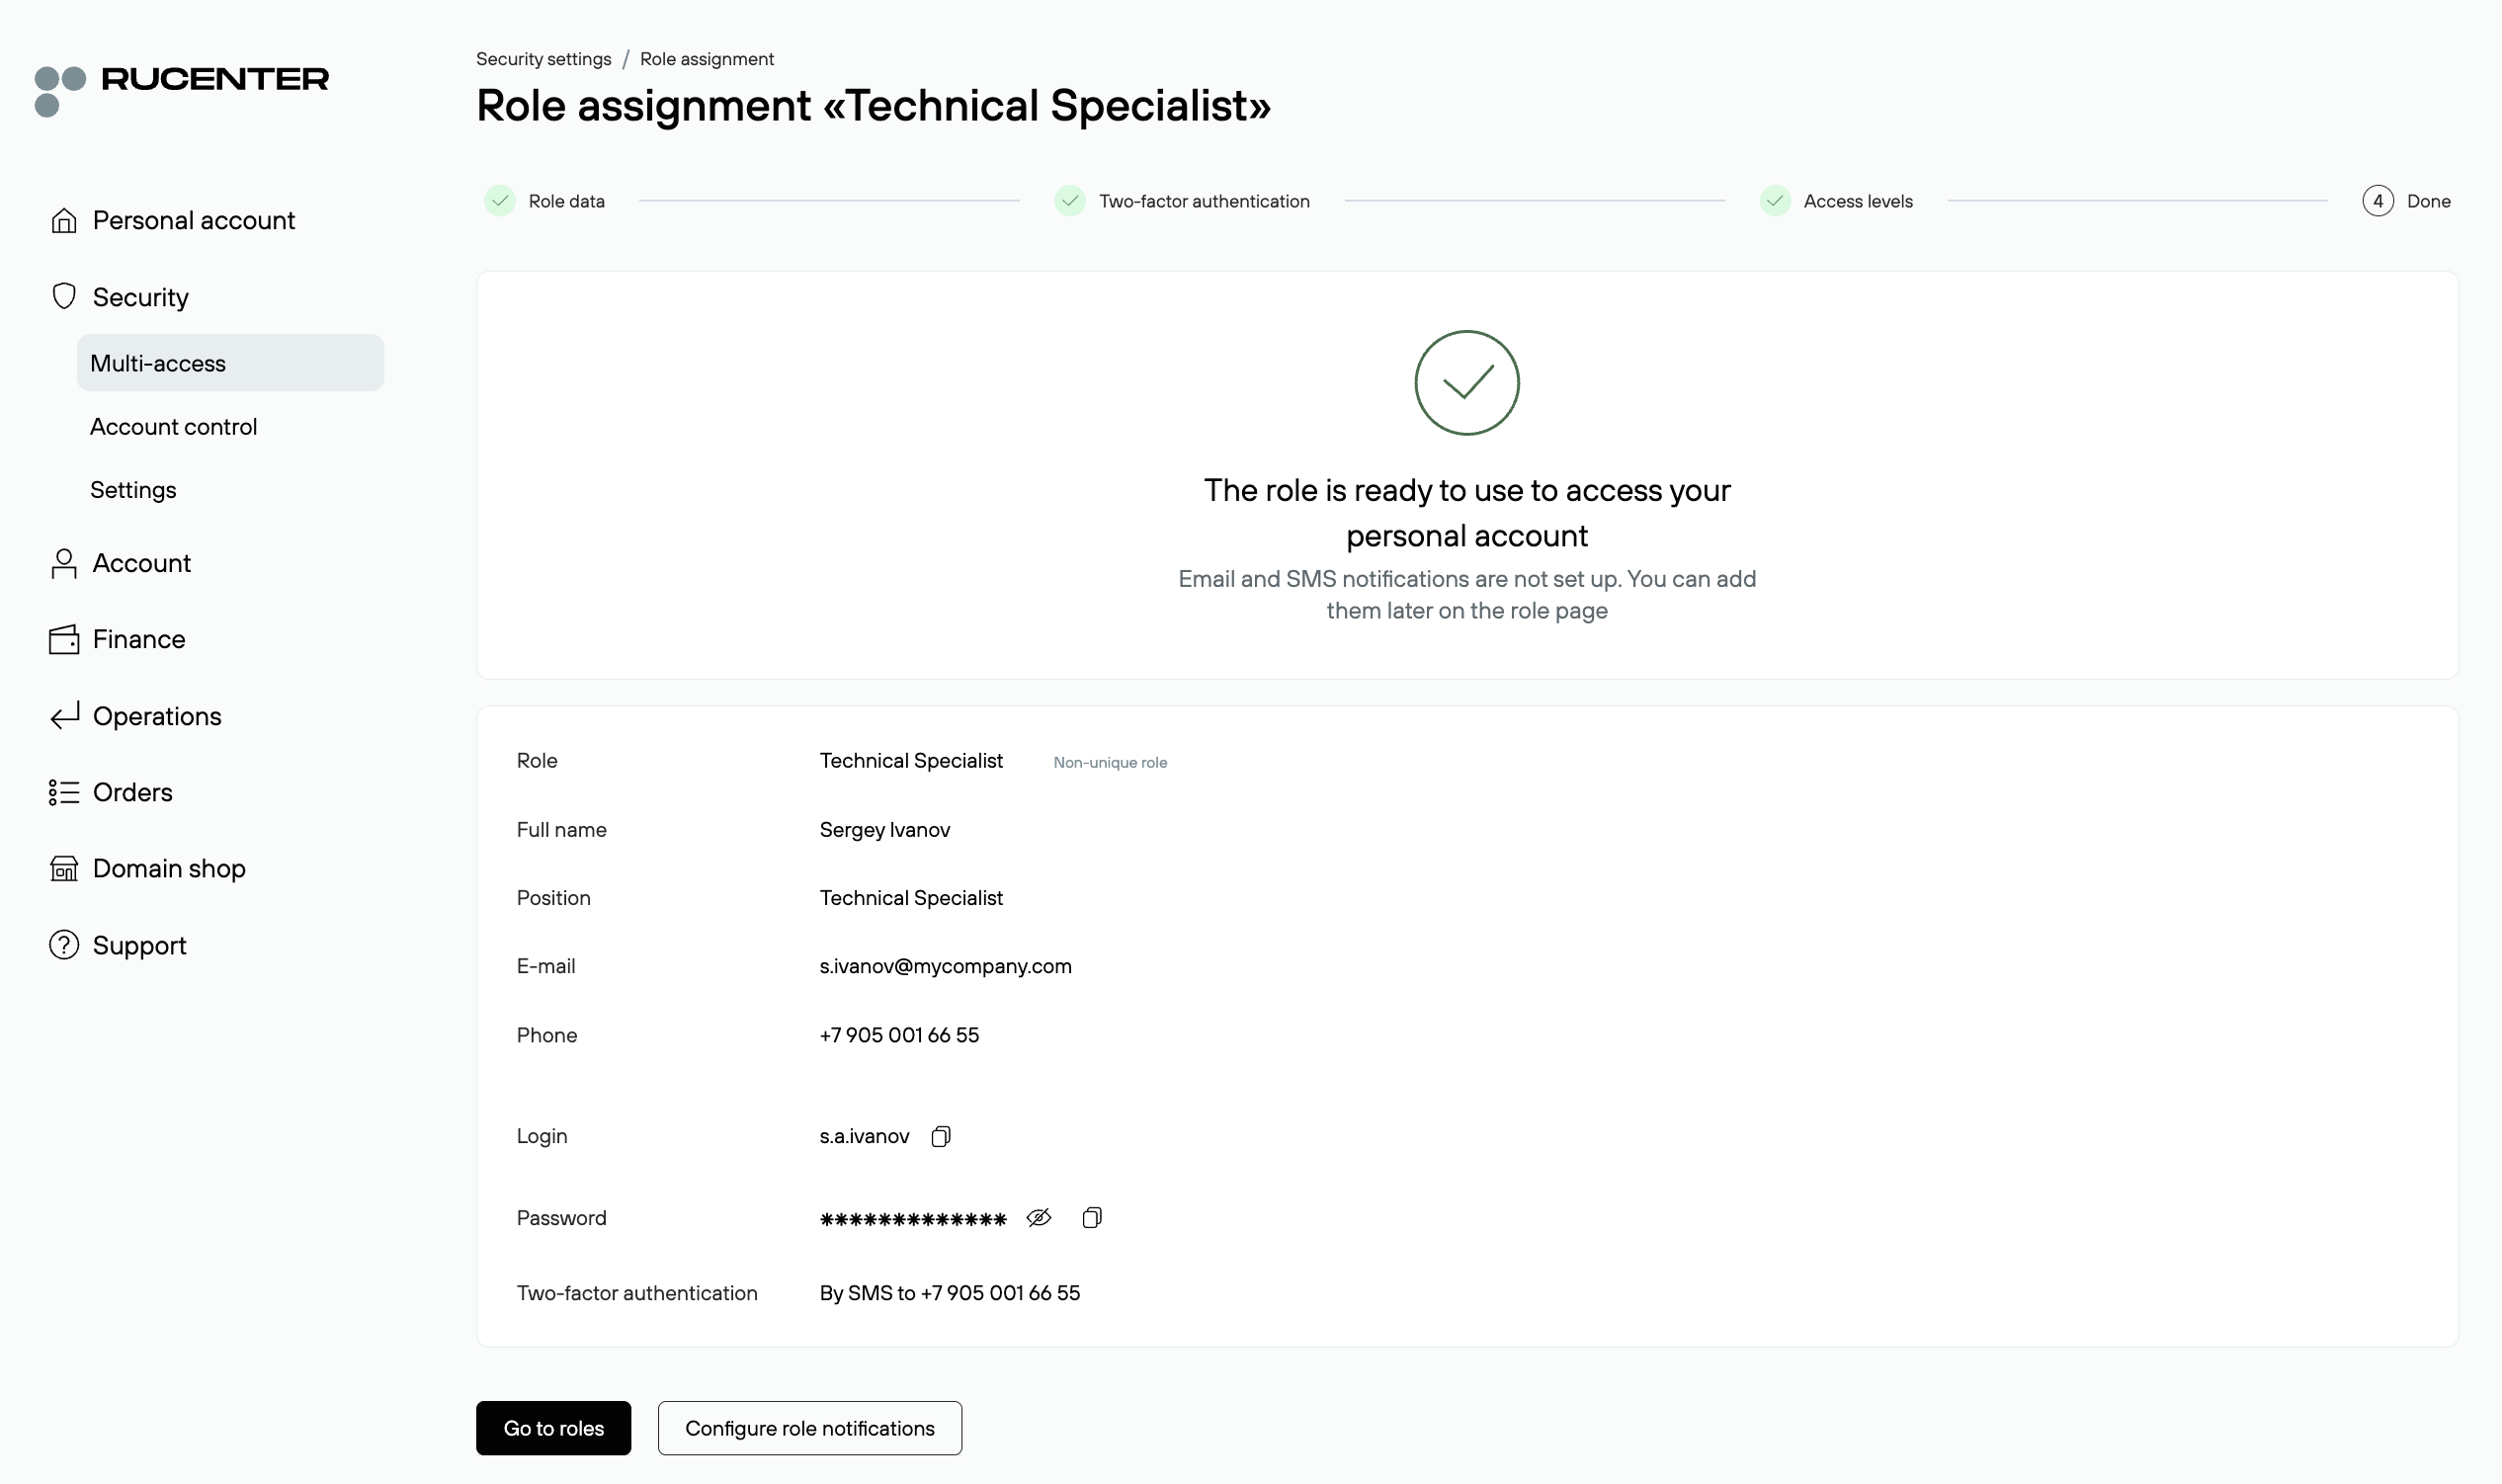
You must provide the role owner with their login, password, and the agreement number — all of which are required for authorization under the role-based access system.
At this stage, the role is created and ready for use. If necessary, you can immediately proceed to notification settings for the role or configure them later.